


Painting the trim in your home takes patience and practice. It can be difficult to paint woodwork without leaving brushstrokes behind. However, you don’t need to be a professional painter to achieve a smooth paint finish; you just need to learn the tricks of the trade! In this step-by-step guide, we’ll answer the all-important question: How do professional painters paint trim?
Read on for in-depth instructions on how to prep, prime, and repaint your interior trim work for professional results—including the type of paint that will give your trim the best results!
Supplies You’ll Need for Painting Trim
- Primer
- Paint
- Sandpaper –120 and 220 grit sandpaper for finish sanding
- Wood filler or spackling to repair damage
- Cleaning sponge
- Bucket
- Mild detergent
- Paintable caulk
- Angled brush – 2.5″ soft bristle paint brush
- Drop cloths
- Painter’s tape
Five-Step Process for Painting Trim
The key to a professional trim paint job is careful preparation. If you’re painting both walls and trim, we recommend painting the trim first. Let the trim paint overlap onto the wall by about a half inch. It’s generally easier to cut wall paint up to the edge of the trim. The exception is if you're painting decorative molding that has a complex profile. It can be more efficient to paint the wall, let it dry, then tape it off and paint the trim later.
Step 1: Clean the trim
Trim collects lots of dust and dirt; don’t skip this step! Wash all trim surfaces thoroughly to remove dirt, dust, or debris using a sponge and a mixture of water and mild soap. Be sure to clean the ledges above doors and windows too. Rinse with clean water and let it dry completely.
Step 2: Prep the trim
Check your trim for rough spots, scratches, or bumps, and use 120 grit sandpaper to smooth any damaged areas. Use a putty knife to fill nail holes and cracks with a wood filler for bare wood or patch for primed or painted trim. Allow the filler to dry completely, then use 220 grit sandpaper until you have a smooth, even surface.
Also be sure to inspect it for any gaps between the wall and trim—now is the time for fresh caulk before new coats of paint go on. If you have sanded anything, wipe away any dust then apply a bead of paintable caulk along the corner where the trim meets the wall. Smooth the caulk with a damp rag or a caulking tool and let it dry completely.
Don’t forget to clean again when you’re done! Use a tack cloth or a damp rag to wipe off the dust from sanding and any caulk residue. The best starting point for any surface about to be painted is Clean, Dry, and Dull!
Step 3: Prime the trim
Trim usually needs to be primed before it's painted. Even Primed Finger Jointed (PFJ) trim from the factory is not always a full-bodied primer. You'll definitely need to prime the trim first when making a significant color change, when the trim is stained, and when the trim has been patched. (If you do not prime your patched spots you could get flashing — when one spot is shinier or duller than others). Bare wood trim also needs to be primed to avoid bleeding through or the knots showing through.
If you are painting your trim a dark color, ask a Ring's End sales team to have it tinted for the most even color. Using a 2.5″ angled soft bristle paint brush, apply a thin coat of primer to every trim surface, starting at the top of the room—moulding, windows, doors—and working your way down. Long, smooth strokes in the direction of the grain will help to avoid brush marks. For flat trim, you may use a small roller as it can be faster than brushing.
The primer may not completely hide what’s underneath – this is fine! The primer is designed to hide stains and/or provide adhesion for your topcoat. Let the primer dry completely before moving on to the next step. After your primer coat dries, you may want to sand again. This can catch any drips or imperfections, creating an even smoother base for a high-end final appearance.
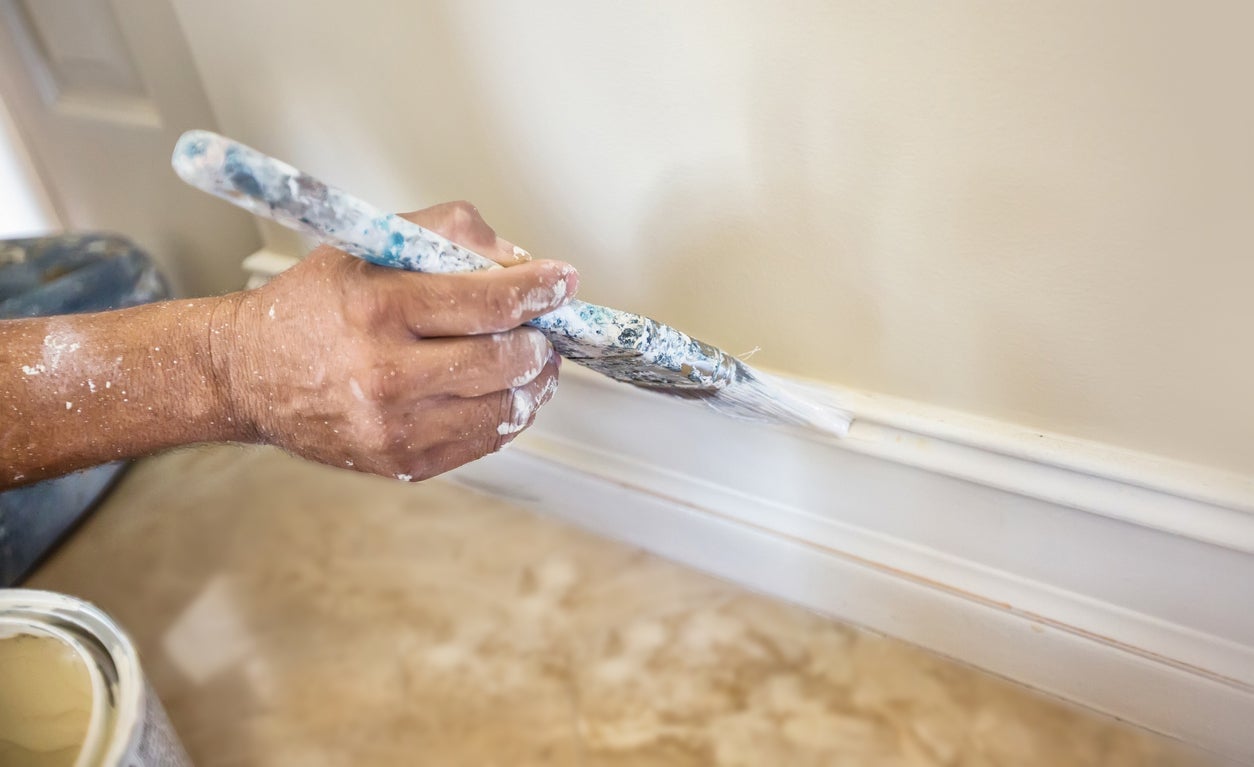
Step 4: Apply the first coat of paint in 2-3 foot sections
Start with a clean paintbrush; dip it into the paint about an inch, and then tap both sides of the brush against the side of the paint tin or pail (don't wipe off all the excess paint). This has the effect of loading the paint on the interior of the brush. Be careful not to overload or overbrush.
Working in 2-3 foot sections, apply the paint the same way you applied the primer, with long, even strokes in the direction of the grain. When you finish a section, start another section two feet away and work back towards your first section, then feather the edges together. Where the trim meets the walls, overlap the trim paint onto the wall (or the masking tape) about a half inch; this makes it easier to create a crisp edge. Remember your first coat is not supposed to cover 100%. A nice thin coat will help build a great base for your second coat. We also recommend sanding the between coats to help catch any minor sags or drips.
Pro Painter’s Tip: Never pass the brush across wet paint, because it will leave a mark. Always start two feet away and feather the painted sections together for a professional finish without brush marks. Paints like ADVANCE have longer dry times so they can self-level. There is no need to overbrush a first coat.
Step 5: Apply a second coat of paint and let it cure
Make sure the first coat of paint is dry before applying a second coat. Check the instructions on your paint can for the “drying time to recoat”. This may take several hours depending on the temperature and humidity. If you see any imperfections on your first coat you can lightly sand them with some 220 grit sandpaper. Just be sure to clean off any dust. Once the second coat is finished, allow plenty of time for the paint to dry. Be gentle with the trim and avoid scrubbing it until the paint has fully cured — this can take up to 30 days. If you need to clean it, use a soft cloth or sponge.
Painting interior trim with professional techniques takes time, but it’s well worth the effort to achieve a smooth, lasting finish. Choose high-quality paint, spend some time practicing your technique, and you’ll be amazed at the results.
Most Premium Trim Paint: ADVANCE Interior Paint
ADVANCE is a premium water-based paint that’s made with alkyd resins, which replicate the flow and feel of oil paint. Created with cabinets and wood trim in mind, ADVANCE forms a durable, scrubbable surface. Benjamin Moore ADVANCE offers a lot of bang for your buck, with smooth application and a hard finish that holds up over time and makes it our number one choice for trim paint.
Great for High Traffic Areas: Scuff-X
Scuff-X is an acrylic paint specially formulated to be one Benjamin Moore's most durable paint products. It is stain-resistant, scrubbable, and washable, making it an excellent choice for trim. Scuff-X is a wide variety of finishes. Its protective coating adds natural gloss, so we recommend leveling down one step from your typical sheen selection when choosing a finish. Scuff-X's eggshell finish is a popular choice for trim and hides brush strokes very well.
Trim Primers
If you're painting new, pre-primed trim or your painted trim is in good condition, no primer is needed.
If you're making a significant color change, such as painting dark trim white, or vice versa, we recommend Fresh Start High-Hiding All Purpose Primer.
If your trim has damage that has been repaired or significant staining such as grease stains, crayon marks, or water stains we recommend Fresh Start All-Purpose Primer.
Buy Trim Paint Online at Ring’s End
Ring’s End carries a wide selection of Benjamin Moore paints in-store and online, shipping anywhere in the U.S. For more helpful tips on selecting paint products, check out our Interior Paint Guide. Our paint professionals are ready and waiting to answer any questions you have about your paint project. Chat with us online or text us at (203) PRO-HELP.