


As a painting professional, encountering cracking and flaking paint is not just frustrating—it costs you valuable time and money. Understanding the underlying causes and how to fix the problem ensures that your projects achieve lasting results.
This guide outlines common reasons why paint cracks or flakes, with clear, actionable solutions you can take today to achieve a high-quality paint finish.
Understanding Why Paint Flakes and Cracks
Flaking and cracking are symptoms of underlying problems in paint application or substrate condition. Effective troubleshooting requires recognizing these issues early to avoid costly rework and client dissatisfaction.
Poor Surface Preparation
Painting over surfaces contaminated with dirt, grease, oil, or mold
Failure to sand glossy surfaces for better paint adhesion
Insufficient removal of existing loose or deteriorating paint layers, resulting in compromised adhesion
Moisture and Water Damage
Dampness, high humidity, or condensation that causes water infiltration
Painting layers that haven’t adequately dried, trapping moisture beneath paint layers
Poorly sealed exterior surfaces that allow moisture absorption post-painting, such as painting one side of a door or deck board
Incorrect Application Methods
Excessively thick or thin application leading to improper drying and curing
Applying a second coat over the top of a first coat that has not thoroughly dried
Application under unsuitable environmental conditions (think high temperatures or direct sun exposure), causing rapid drying and stress on the paint film
Substrate Age and Degradation
Wood, plaster, and drywall substrates naturally shift or degrade, causing the paint to crack.
Freezing and thaw cycles can cause exterior wall degradation because moisture builds up on the interior surfaces and causes cracking in the paint surface. This can happen when your gutters go through a winter freeze-and-thaw cycle throughout the day. The water flows towards the interior of the house while it is thawing, then freezes again at night when the temperatures drop. This expansion and contraction causes the paint to crack.
Older, previously painted surfaces often have paint buildup. As these layers of old paint age, the paint loses its flexibility, causing cracking or flaking.
Type of Paint Used
Using a low-quality paint can increase the likelihood of cracking because cheaper paints offer lower adhesion between the surface and the paint, followed by less flexibility after the paint dries.
Applying an incompatible paint without primer can also cause adhesion problems. For example, a latex paint applied directly over an oil-based paint often results in peeling because the two coats won’t bond to one another.
Diagnosing Specific Flaking and Cracking Patterns
Check out the problem areas to see exactly what’s going on. Here are some common scenarios you’re likely to run into:
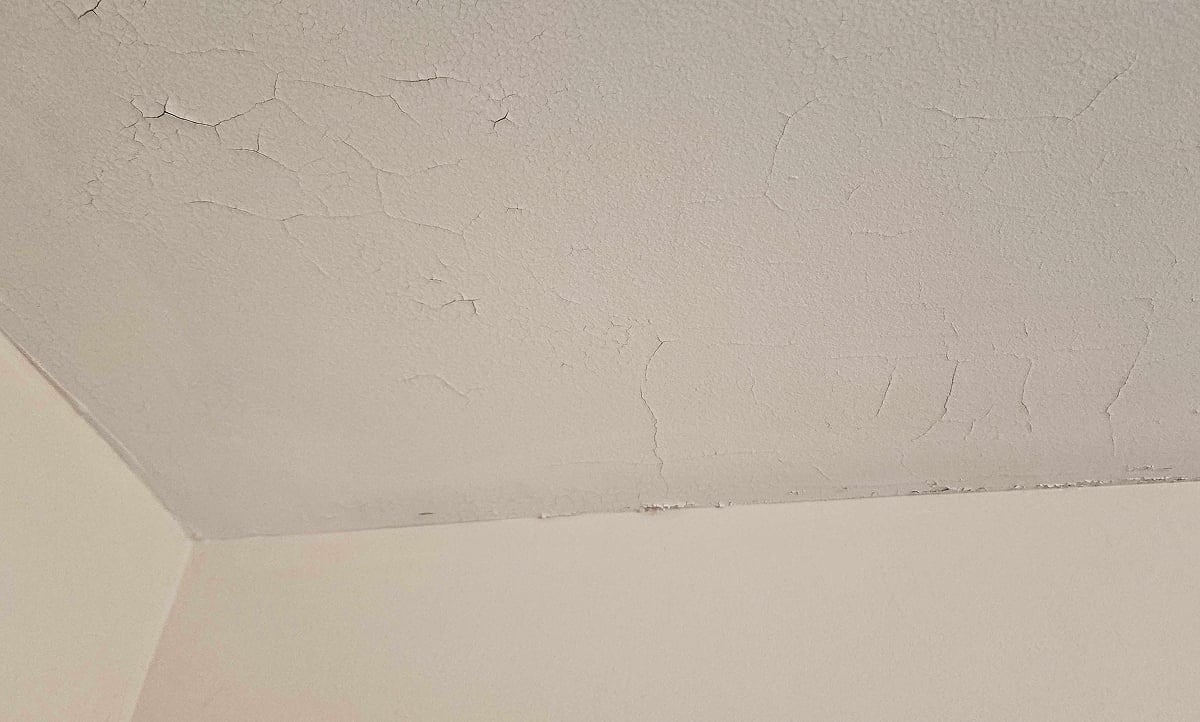
Hairline Cracks: These fine cracks generally occur due to improper surface preparation or older, less flexible paint cracking from minor surface movement.
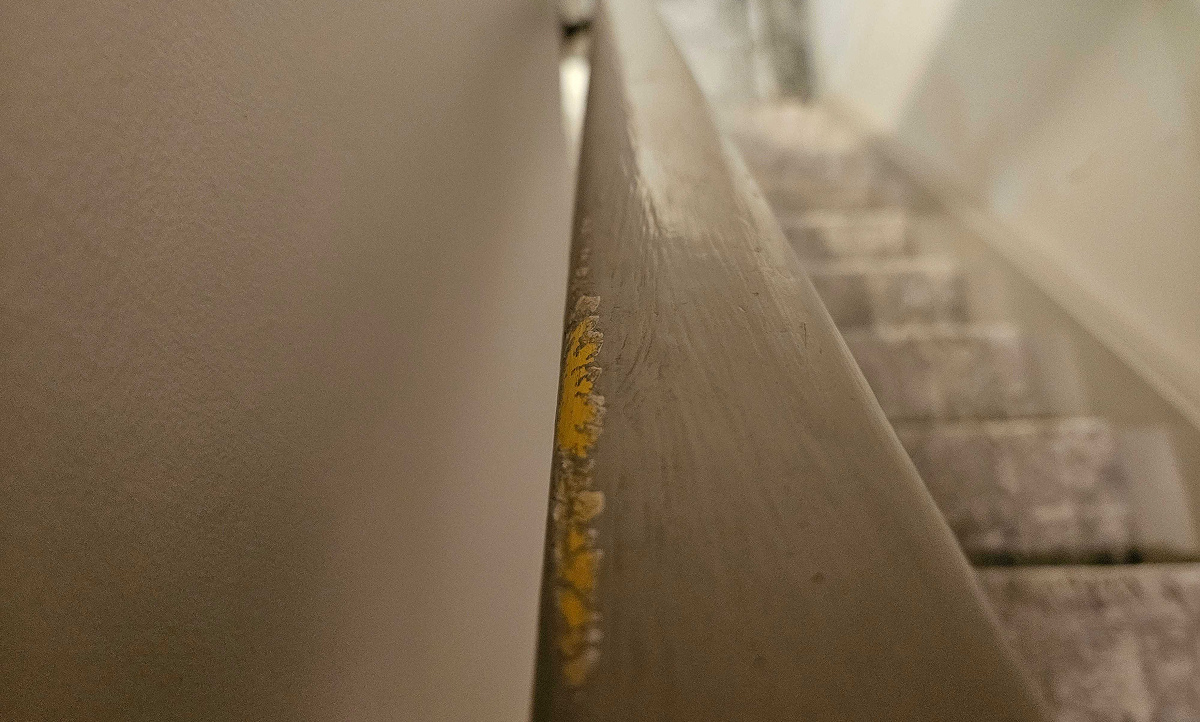
Flaking or Peeling Paint: Flaking and then peeling often occur after cracking. The cause of peeling paint is adhesion failure from inadequate preparation or moisture intrusion.
Alligatoring: Distinct, deep, wide cracks resembling alligator skin are usually caused by applying inflexible paint over more flexible paint, paint application errors, or prior use of lead paint.
Solutions for Flaking and Cracking Issues
Step 1: Fix Moisture Problems
You have to find and rectify moisture problems before repainting, or the problem will recur:
- Repair plumbing leaks, drainage issues, and sources of condensation.
- Use a moisture meter to be sure it’s safe to paint. High moisture content will negatively affect curing and adhesion.
- Guarantee adequate ventilation during and after the painting process.
- Choose a mildew-resistant primer and paint made for humid areas like bathrooms, which tend to have high moisture.
- Investing in an upgraded bathroom ventilation fan often resolves moisture problems in bathrooms because older fans don’t effectively remove humidity after hot showers or baths.
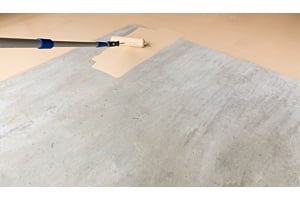
Step 2: Prepare the Surface
Preparation before you repaint is key to achieving lasting adhesion for your paint job. Here’s how to create a clean, dull, and dry surface:
- If alligatoring is the problem, test for lead-based paint first with a lead test kit because sanding lead-based paint can be dangerous to your health. Follow guidelines for lead paint removal if the test reveals the presence of lead paint.
- Use a paint scraper or wire brush to thoroughly remove loose paint.
- Sand to create a smooth surface so that paint adheres effectively. We recommend 180-grit sandpaper for interior walls and 120-grit for exterior surfaces. Our Sandpaper Guide has more information about which grit to choose.
- Carefully clean surfaces to eliminate contaminants, using specialized cleaning agents for best results. We recommend Zinsser JOMAX or 30 Seconds Outdoor Cleaner for exterior surfaces and Krud Kutter or Simple Green for interior walls, trim, and doors.
- Remember to rinse or remove cleaner residues also, since these residues can cause adhesion issues. We like Savogran All-Purpose Cleaner for this last cleaning step. TSP is a no-rinse cleaner, but it isn’t available in all states.
Step 3: Select the Right Paint and Primer
Priming significantly improves paint adhesion and longevity, so be sure to select primers tailored to specific surfaces—wood primers sealing tannins, metal primers preventing rust. For example, INSL-X High Build Peel Bonding Primer works wonders on exterior surfaces where peeling has been a problem.
It’s equally important to choose high-quality paints known for durability and adhesion. Going cheap or buying from big box stores for your new paint may end up costing you in the long run.
We recommend Benjamin Moore because the entire line of interior and exterior paint is formulated for long-term durability and flexibility due to advanced resin technologies, significantly reducing flaking and cracking risks.
Step 4: Follow Paint Application Best Practices
Once your surface is clean, dry, and dull, it’s safe to repaint. Here are a few of our top paint application tips:
- Apply even coats of primer and paint to enhance drying and adhesion. A thin layer is always better than a thick, uneven coat.
- Haste makes waste — stick to the manufacturer's recommended drying times rather than trying to shortcut the process. Adequate drying between layers of paint increases adhesion.
- When painting a bathroom, always allow the paint to cure before exposing it to humidity or moisture. Most bathroom paints recommend 24 hours of curing time before using the shower—check the paint can to be sure.
- Avoid painting during weather extremes or in direct sunlight. Ideal temperatures are between 50°F and 80°F. Check out our exterior painting weather guide to learn more about working with all kinds of weather conditions.
Preventive Strategies to Mitigate Future Issues
The best way for paint professionals to solve the problem of cracking and flaking paint is to be proactive:
- Implement detailed surface preparation standards in every project.
- Schedule painting within the range of weather conditions recommended by the manufacturer.
- Educate clients thoroughly on post-application care, emphasizing moisture control and maintenance practices.
Investing in prevention and careful attention to detail ultimately protects your reputation, saves time, and maximizes project profitability.
Ring’s End Is Here for You
Still have questions? Our paint team is always happy to help solve problems and provide product recommendations. You can contact a real person using our online chat, by phone, or by texting (203)-PRO-HELP.
Here at RingsEnd.com, we carry a complete line of paint supplies and tools – and we also ship Benjamin Moore products virtually anywhere in the U.S. (excluding AK, HI, and SC). Avoid the hassle of waiting for a paint order to be mixed by ordering your Benjamin Moore products online. You’ll find ordering paint and supplies ahead of time is a great time-saver!
Live in the Northeast? You can also pick up paint orders at one of our 34 conveniently-located paint stores or arrange for delivery from Ring’s End to your door.