

Bubbled paint isn't just an eyesore—it's a red flag pointing to deeper issues beneath the surface. Paint bubbling can compromise the durability of your work, impacting client satisfaction and your professional reputation.
This guide dives into the reasons behind paint bubbling, practical remedies, and proactive steps you can take to prevent these problems from happening again.
What is Paint Bubbling?
Paint bubbling, also called blistering, occurs when moisture or air bubbles form under the paint film. These bubbles can appear shortly after painting or even months later, causing it to lift and eventually peel.
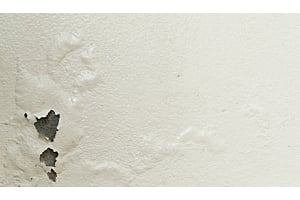
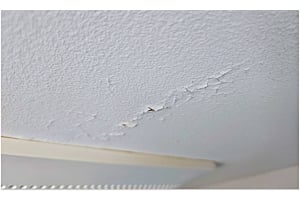
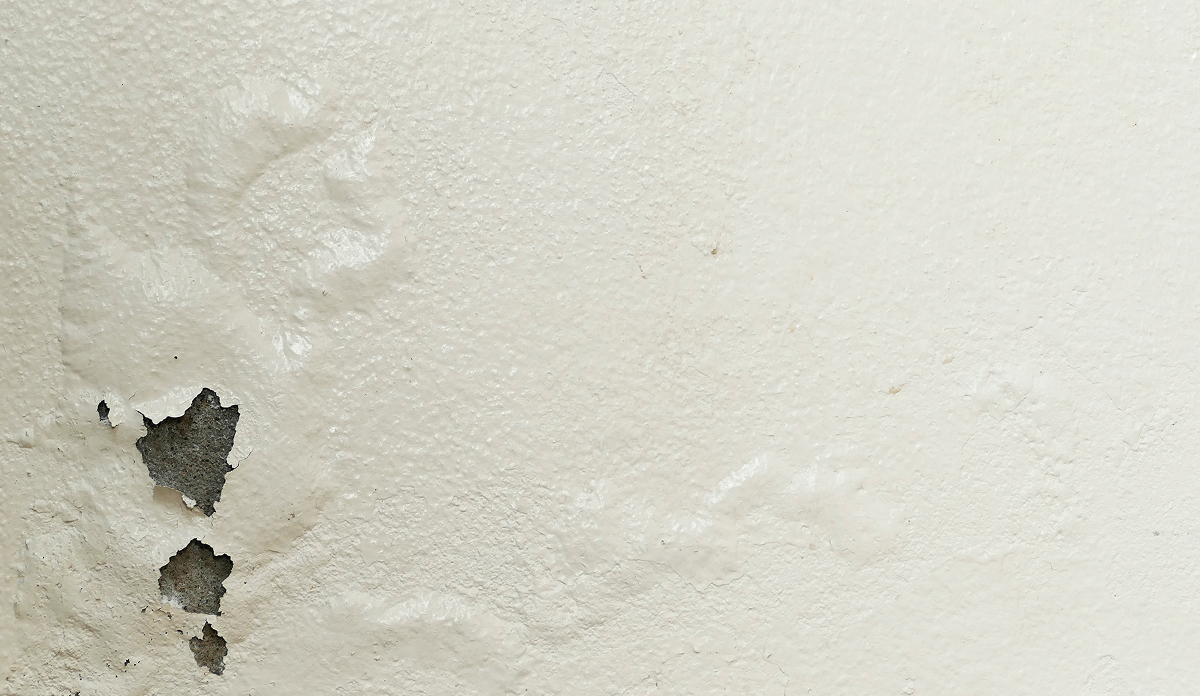
Recognizing Paint Bubbling Issues
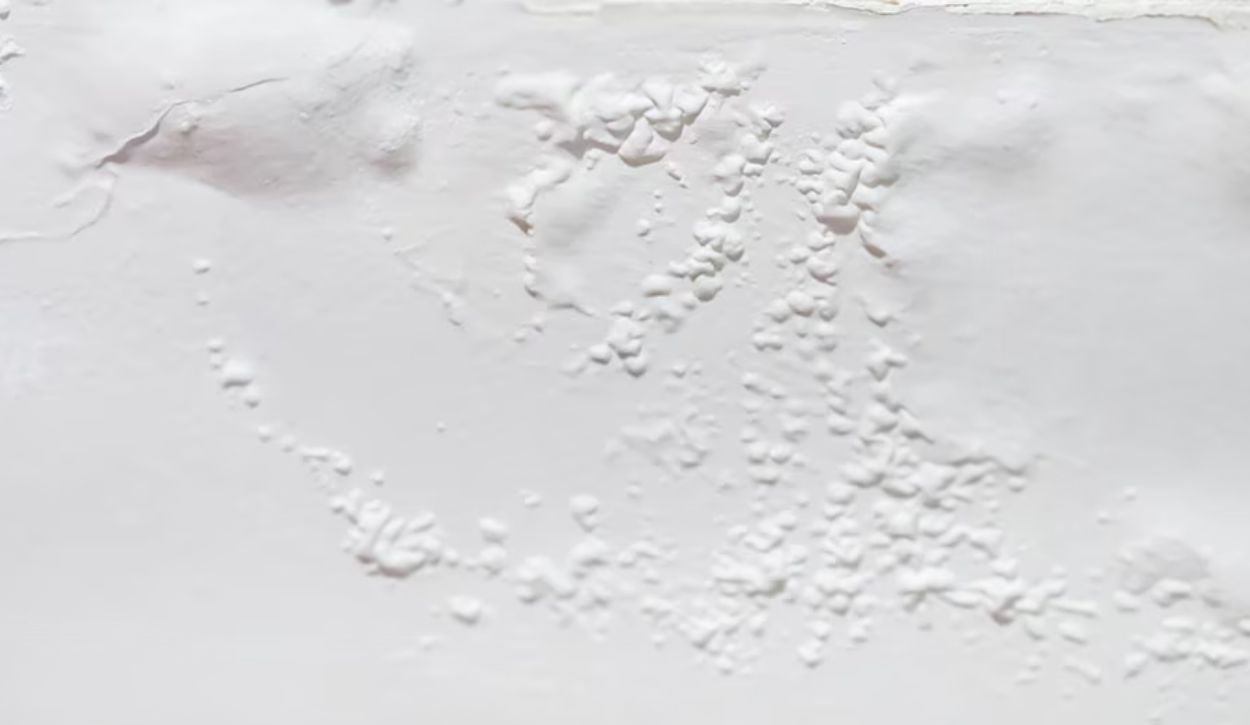
Wall with paint bubbling
Paint bubbles range in size from small to large, uneven blisters. Blisters that appear in a specific area often point to localized moisture issues, like leaks or condensation behind interior painted walls.
Common Causes of Paint Bubbling
If you have bubbling, you have underlying problems with paint application techniques or the condition of the substrate. Let’s take a look at common reasons why paint blistering occurs to help you troubleshoot the problem.
Moisture-Related Issues
- Exposure to high humidity, dew, or rain (during or right after painting)
- Moisture within porous substrates like drywall, wood, siding, or plaster
- Condensation or leaks behind the painted surface, such as faulty plumbing or insufficient insulation
Temperature-Related Bubbling in Exterior Paint
- Exterior paint dries too quickly when painting in direct sunlight, trapping moisture and solvents beneath the paint film
- Applying paint to a cold surface so it freezes, causing the paint to blister after it fully cures in normal temperatures
- The freeze/thaw cycle can cause paint to bubble
Contaminant Issues
- Dirt or oils on the surface hinder adhesion
- Painting directly over surfaces with mold, mildew, or soap film
Paint Application Errors
- Applying paint on damp surfaces, perhaps not fully dried after washing or rain
- Painting an unprimed surface
- Not allowing adequate drying time between coats of paint
- Stirring the paint too rapidly or using the wrong roller nap introduces air into the paint, creating air bubbles
- Overly thick layers of paint that slow dry time
Type of Paint Used
- Low-quality paint can increase the likelihood of bubbling because cheaper paints offer lower adhesion between the surface and the paint
- Applying an incompatible paint without primer can also cause adhesion problems. For example, a latex paint applied directly over an oil-based paint often results in bubbling or peeling because the two coats of paint won’t bond to one another
How to Fix Paint Bubbling
Step 1: Find and Fix Any Moisture Problems
Addressing moisture problems before repainting is important to prevent the problem from recurring:
- Repair plumbing leaks, drainage issues, and sources of condensation. Be sure to caulk carefully.
- Use a moisture meter to be sure it’s safe to paint. High moisture content will negatively affect adhesion.
- Investing in an upgraded bathroom ventilation fan often resolves moisture problems in bathrooms because older fans don’t effectively remove humidity after hot showers or baths.
- Consider using dehumidifiers or fans during and after painting for adequate ventilation.
Step 2: Prepare the Substrate
A well-prepped substrate is key to getting strong paint adhesion. Here’s how to create a clean, dull, and dry surface:
- Use a paint scraper or putty knife to thoroughly remove the blistered or peeling paint. (In older homes, it’s wise to test for lead-based paint first with a lead test kit because sanding lead-based paint can be dangerous to your health. Follow guidelines for lead paint removal if the test reveals the presence of lead paint.)
- Sand to create a smooth surface—you don’t want the edges of the old paint showing through the new paint. We recommend 180-grit sandpaper for interior walls and 120-grit for exterior surfaces. Our Sandpaper Guide has more information about which grit to choose.
- Carefully clean surfaces to eliminate contaminants, using specialized cleaning agents for best results. We recommend ZinsserJOMAX or 30 Seconds Outdoor Cleaner for exterior surfaces and Krud Kutter or Simple Green for interior walls, trim, and doors.
- Note: Remember to rinse or remove cleaner residues also, since these residues can cause adhesion issues. We like Savogran All-Purpose Cleaner for this last cleaning step. TSP is a no-rinse cleaner, but it isn’t available in all states.
- Ensure the area is clean and dull, using a moisture meter to confirm the surface is dry.
Step 3: Select the Right Paint and Primer
Blistering is an adhesion problem, and primer is a no-brainer for increasing adhesion between the substrate and paint. A common interior mistake is to paint directly on new sheetrock or over areas patched with joint compound. Prime first! We recommend choosing a mildew-resistant primer with excellent adhesion and sealing properties like Benjamin Moore Fresh Start High-Hiding Primer for interior painting.
For exterior surfaces where bubbling and peeling have been a problem, INSL-X High Build Peel Bonding Primer is highly rated.
It’s equally important to choose high-quality paints known for durability and adhesion. Avoid the temptation to “save” money on your paint purchase—cheap paint is expensive!
We recommend Benjamin Moore because the entire line of interior and exterior paint is formulated for long-term durability and flexibility due to advanced resin technologies, significantly reducing the risk of bubbling and peeling.
Step 4: Follow Paint Application Best Practices
Once your surface is clean, dry, and dull, it’s safe to repaint. Be sure to follow our top paint application tips:
- Apply even coats of primer and paint to enhance drying and adhesion. A thin layer is always better than a thick, uneven coat.
- Stick to the manufacturer's recommended drying times rather than trying to shortcut the process. Adequate drying between layers of paint increases adhesion.
- When painting a bathroom, always allow the paint to cure before exposing it to humidity or moisture. Most bathroom paints recommend 24–48 hours of curing time before using the shower—check the paint can to be sure.
- Avoid painting during weather extremes or in direct sunlight. Ideal temperatures are between 50°F and 80°F. Check out our exterior painting weather guide to learn more about working with all kinds of weather conditions.
Prevention Strategies for Future Projects
Going forward, take these steps:
- Never skip fixing underlying causes! If the area is wet, there’s a reason. Even the best prep and paint won’t hold up if the surface continues to absorb water.
- Always verify surface dryness with moisture meters before painting.
- Choose high-quality paint and primer specific to the demands of the project.
- Schedule painting projects during favorable weather conditions, avoiding high humidity or rain forecasts. Avoid painting hot surfaces or in direct sunlight.
- Communicate clearly with homeowners regarding moisture control practices and maintenance.
Ring’s End Is Here for You
Still have questions? Our paint team is always happy to help solve problems and provide product recommendations. You can contact a real person using our online chat, by phone, or by texting (203)-PRO-HELP.
Here at RingsEnd.com, we carry a complete line of paint supplies and tools – and we also ship Benjamin Moore products virtually anywhere in the U.S. (excluding AK, HI, and SC). Avoid the hassle of waiting for a paint order to be mixed by ordering your Benjamin Moore products online. You’ll find ordering paint and supplies ahead of time is a great time-saver!
Live in the Northeast? You can also pick up paint orders at one of our 34 conveniently-located paint stores or arrange for delivery from Ring’s End to your door.