Painting kitchen cabinets is a big task, but it saves thousands over buying new cabinets or paying professional painters. With the right preparation, products, and technique, painting kitchen cabinets is a project you can DIY and achieve a durable finish without chipping. We’ve put together this kitchen paint guide to help you answer all the big questions about how to paint your kitchen cabinets — including step-by-step tips for your project.
Should I paint my cabinets myself?
Before you consider painting cabinets, make sure they’re in good condition. Look inside for signs of water damage, bowed wood, or disintegrating fiberboard. Once you’ve determined the cabinets are worth keeping, consider the type of material they’re made from. Almost any material can be painted with good surface preparation and the right products. Do you have solid wood cabinets or wood veneer over particle board? Does your kitchen have MDF or laminate cabinets? Have they been painted before? Different types of cabinets require slightly different painting methods, and some are more labor-intensive. But if you know your way around a brush and roller, you can do this! You’ll need at least five days to achieve a professional-looking and durable paint job.
What type of paint do I need for cabinets?
Oil paint was long thought to be the best paint choice due to its durable finish, but now that we know it has high levels of VOCs, and now has been reformulated with lower VOCs or eliminated. Today, most homeowners paint kitchen cabinets with either latex or alkyd paint. Advancements in paint technology from companies like Benjamin Moore have given us water-soluble, or waterborne alkyds that are low-VOC paints that are equally durable, safer, and healthier to live with.
Best Alkyd Paint: Fine Paints of Europe Hollandlac Sign Enamel
Alkyd paints have long been used for kitchen cabients because of their durability to every day wear and use. Alkyd paints do have longer dry times compared to their waterborne alkyd partners, which help with eliminating brush and roller marks.
Fine Paints of Eurpoe has Brilliant 98 is an ultimate high gloss sheen for that candy coated mirror finish. Finishes like this require a professional sprayer to get the best result. Fine Paints of Europe also had a Hollandlac also has a Satin sheen which is more forgiving on surfaces when you brush and roll application.
Fine Paints of Europe requires you use their Alkyd based undercoater under the Brilliant or Satin sheens. Fine Paints of Europe undercoater is easily sandable and best for top coat adhesion.
Best Waterborne -Alkyd Paint: Benjamin Moore Advance
Alkyd paints are a modern product designed to replace oil paints. Most consist of an alkyd resin dissolved in a solvent, instead of a pigment suspended in oil. Alkyd resin paint was designed to replace oil and latex paints with a cleaner, safer formula.
Benjamin Moore has created a water-soluble alkyd paint with their Advance paint products. Preferred by professional painters, water-based alkyd paint feels like an oil-based paint during application, and it levels to a smooth, furniture-like finish. Plus, Benjamin Moore Advance is available in more than 3,500 Benjamin Moore colors and three paint sheens.
Best Paint Sheens: Satin, Semi-Gloss, or High-Gloss
The next decision to make about kitchen cabinets paint is its sheen or finish. The sheen is the amount of light that reflects off the painted surface to create a shine. For painting cabinets, most homeowners choose some level of shine because glossy finishes are easy to wipe down. Unlike flat paint, glossy paints form a durable, smooth surface that stands up to frequent cleaning.
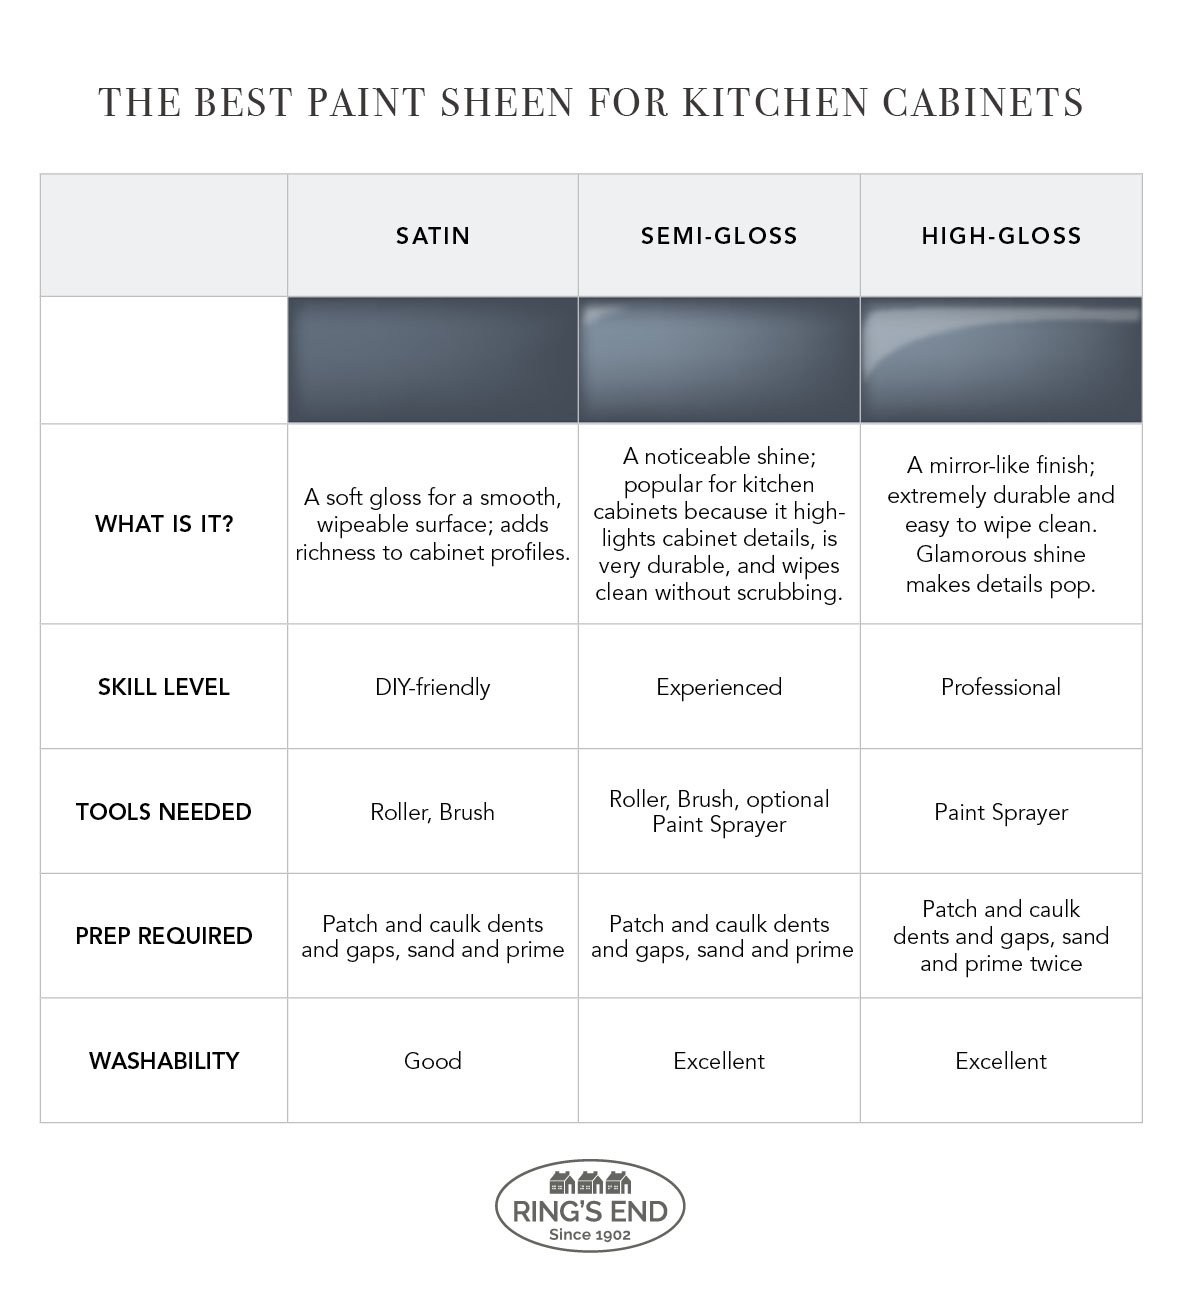
Which paint sheen is best for your kitchen? It depends on your skill level, whether it’s a DIY project, the condition of your cabinets, and the look you’re trying to achieve. The glossier the sheen, the more protection it will provide, but also the more difficult it will be to hide brush strokes.
Always choose a satin, semi-gloss, or high-gloss paint finish instead of flat or eggshell for cabinetry and woodwork. These three cabinet sheen options are available in Benjamin Moore Advance Interior Paint — our top choice for cabinets because of its smooth, furniture-like finish.
How to Prep and Paint Kitchen Cabinets
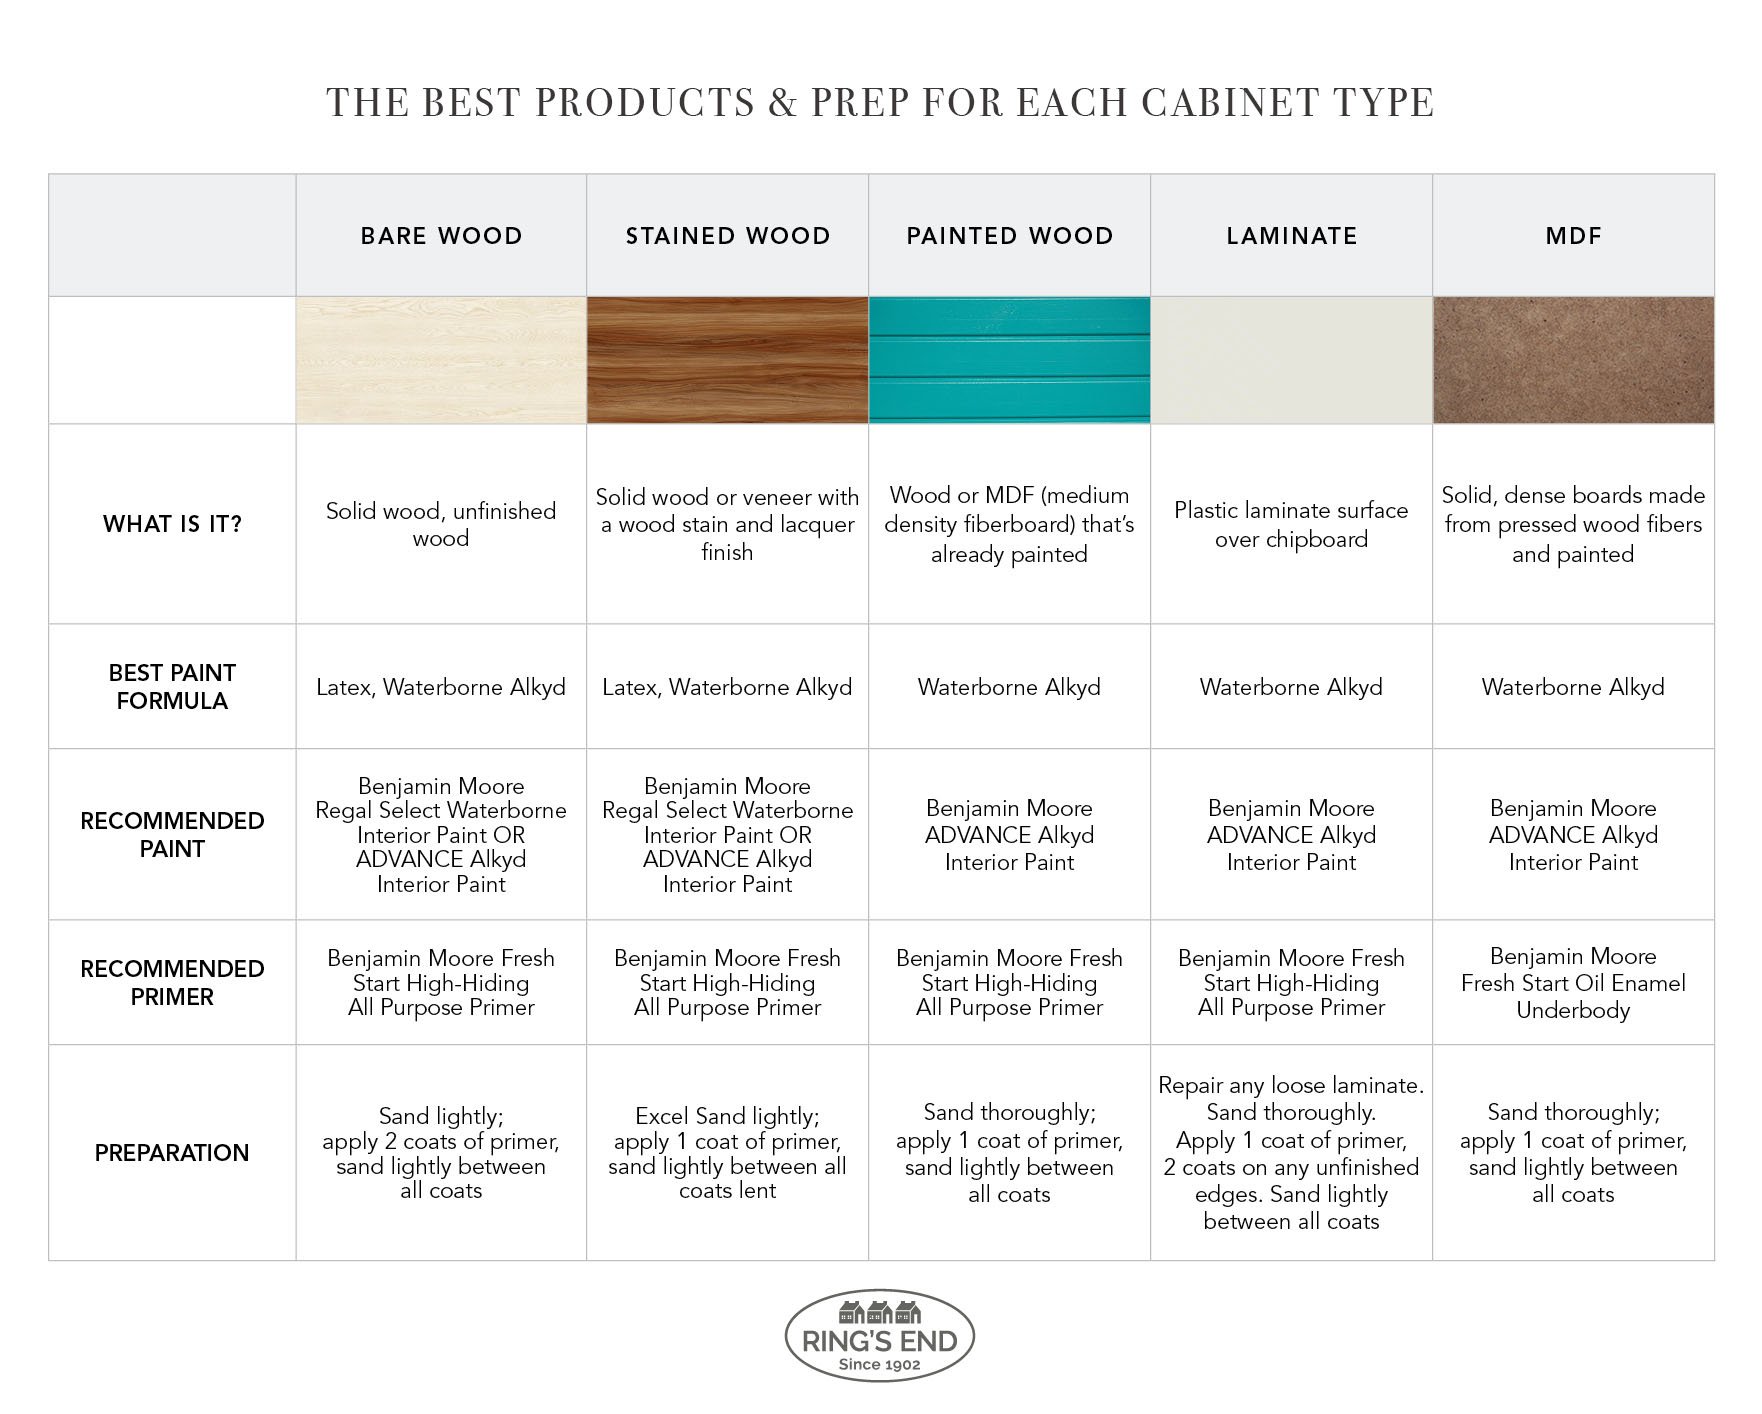
While any cabinet material can be painted, some types require specialized paint products or extra steps in the process. It’s important to know what your cabinets are made of before you order your paint. This handy chart has it covered, with recommendations for the right primer, the best paint, and the amount of work involved in painting each cabinet material:
Choose the Best Brushes & Rollers for Cabinets
For the best results when painting cabinets, you'll want to use the right brushes and rollers for the job. The best paintbrush for cabinets is narrow enough to reach into tight spots and has medium or soft bristles that help to prevent brush marks. Choose synthetic bristles of nylon, polyester, or a combination of both; they are designed for latex and alkyd paints. (Natural bristles are not suitable because they absorb water.) An angled brush creates a sharper paint line, so it’s ideal for cutting in clean edges. A nylon 2.5” angled brush is the professional choice for a smooth, even finish.
The best roller for cabinets is a foam roller because it has no nap, or surface texture. Thick-napped rollers are designed to hold more paint for better coverage on large walls. A flat-surfaced foam roller applies a thinner coat of paint, making it much easier to avoid lap marks and create a smooth finish. A small cabinet roller (4”-8” wide) is also much easier to maneuver inside cabinets and around the edges.
Prepping & Priming Cabinets
The most important step before picking up a paint brush is preparing all cabinet surfaces. If your cabinets are already painted, you should test the old paint to see if it’s oil or latex. This will help you choose the right primer so the new paint adheres without chipping. To test paint, just dip a rag in acetone and rub it on the paint. If it softens or comes off, it’s latex paint. If nothing happens, it’s oil paint.
Take the information about your cabinet materials and old paint to the paint store to help you buy the correct primer. A multi-purpose primer like Benjamin Moore’s Fresh Start High-Hiding All Purpose Primer is ideal for most cabinet projects. It offers superior bonding over both oil and latex paint.
Painting kitchen cabinets takes several days, so you’ll need to set up a dedicated workspace. In addition to a primer, cabinets require 2-3 coats of paint on both the fronts and backs of cabinet doors, with time to dry in between. Clear out a garage or adjoining room and set up a few tables draped in plastic for the cabinet doors to safely dry. You’ll also want to empty the cabinets completely and slide appliances out to reach any hidden areas. Then gather your painting tools and supplies.
Cabinet Painting Supply List
Paint Supplies
- Primer
- Paint
- Painter’s tape
- 2.5 inch angle sash brush
- Cabinet roller and foam roller covers
- Plastic dropcloths
- 120-grit sandpaper or sanding block
- 300-400 grit sandpaper
- Tack cloth
- Wood filler
- Degreaser such as TSP
- Chemical deglosser (optional)
Household Supplies
- Putty knife
- Screwdriver or drill
- Sponge and bucket
- Clean rags
- Painter’s pyramid supports (optional)
- Step ladder
Much of the painting process is actually preparation work. For a successful cabinet paint job, it’s critical that all surfaces of the cabinet are smooth, clean and dust-free. Professional painters often use a paint sprayer for a furniture-grade finish without brush marks; they may even take the doors to a shop to spray paint them. That’s a topic in itself, so for our DIY homeowners we’ll focus on working with a brush and roller instead.
Step 1: Remove cabinet doors and hardware
Flat surfaces are critical to a great paint job. Use a screwdriver or power drill to remove all the cabinet doors and lay them flat on your work tables. Remove the hinges and knobs and set them aside. If you’re replacing the hardware and won’t reuse the existing holes, fill them with wood filler. Use plastic drop cloths and painter’s tape to protect the countertops, backsplash and floors.
Step 2: Clean and prep all cabinet surfaces
Even a clean-looking kitchen can have cooking residue on cabinet surfaces. Use a sponge and bucket to wash cabinets with a degreaser like TSP. This removes any grease and helps de-gloss the surface. If the cabinets have a shiny finish, a chemical deglosser is a good next step. Let them dry thoroughly.
Step 3: Prep with sandpaper and tack cloth
Sand all surfaces with the 120-grit sandpaper, making sure to get into any crevices. A sanding sponge is helpful for moldings. There’s no need to remove the existing paint or finish; just be sure to rough up the entire surface. Sand any filled holes thoroughly for a nice flat surface. After sanding, wipe down with a damp rag to remove dust; then wipe again with the tack cloth.
Step 4: Apply a coat of primer
Make sure your paint brush is clean and the bristles are smooth. Apply a thin primer coat to all surfaces using the foam roller; use the angled brush to paint corners and moldings and catch drips. Start with the cabinet doors – they take longer because you need to paint both sides, with drying time in between. Starting with the backs of cabinet doors is a great way to practice your painting skills! Always work from the center outwards; roll the middle of door panels and finish off edges with the brush. When repainting inside cabinets, working back to front helps minimize the mess.
While the doors dry, move on to the cabinet boxes, and then come back and paint the cabinet door fronts. This step will probably take up the rest of your workday, so let everything dry overnight.
Step 5: Sand cabinets after priming
Once the primer has dried for 16-24 hours, sand the cabinets again to achieve a smooth surface. This time, use a medium 300-400 grit sandpaper or sanding block. Pay special attention to grooves or corners where flat areas meet to remove drips or pooled paint. This is also your opportunity to fix any dings or gaps you see with wood filler or caulk. Any imperfections on the surface will be highlighted by the paint sheen, so take the time to prep carefully. Wipe away the dust with a rag, and go over everything again with the tack cloth.
Step 6: Paint!
Finally, it’s time for the first coat of paint. Use both the foam roller and the angled brush. Starting again with the backs of cabinet doors, roll the surface and use the brush to catch drips and paint any details. Let the doors dry completely while you paint the cabinet boxes. If you’re using latex paint, you can probably return later the same day to paint the door fronts if they’ve had time to dry. Alkyd paint takes longer to dry before re-coating. Let everything dry overnight before moving the doors to paint the other side.
Step 7: Sanding after the first coat
Sanding after each coat of paint provides a smooth surface for the next coat. Use your medium 300-400 grit sandpaper to erase brush strokes or roller marks. If any filled-in holes are visible, patch and sand them again to make sure they blend in. Wipe all cabinet surfaces with a damp rag to remove dust, and again with the tack cloth so everything is super clean for the final coat.
Step 8: Paint the final coat
By now, your painting skills will be top notch – it’s time to tackle the final coat of paint! Your cabinets may look great after the first coat, but a second coat provides complete coverage and builds paint thickness for a protective coating. Check the instructions on your cans of paint to make sure the paint has dried the required number of hours for re-coating. Then use the brush and roller to apply the last coat. Be sure to allow sufficient drying time before moving the doors to paint the reverse side.
Step 9: Let cabinets dry thoroughly
We know you’re excited to put the kitchen back together! But this isn’t the time to rush. Paint may feel dry to the touch, but it needs the full drying time to develop a durable finish (and not stick during installation). Let everything dry in your work area for at least 24 hours. While you wait, clean up the drop cloths and supplies and remove the masking tape. Remember, most paint takes a few weeks to fully cure. Handle all doors and drawer fronts carefully and avoid scrubbing until the paint has cured.
Step 10: Reassemble and install hardware
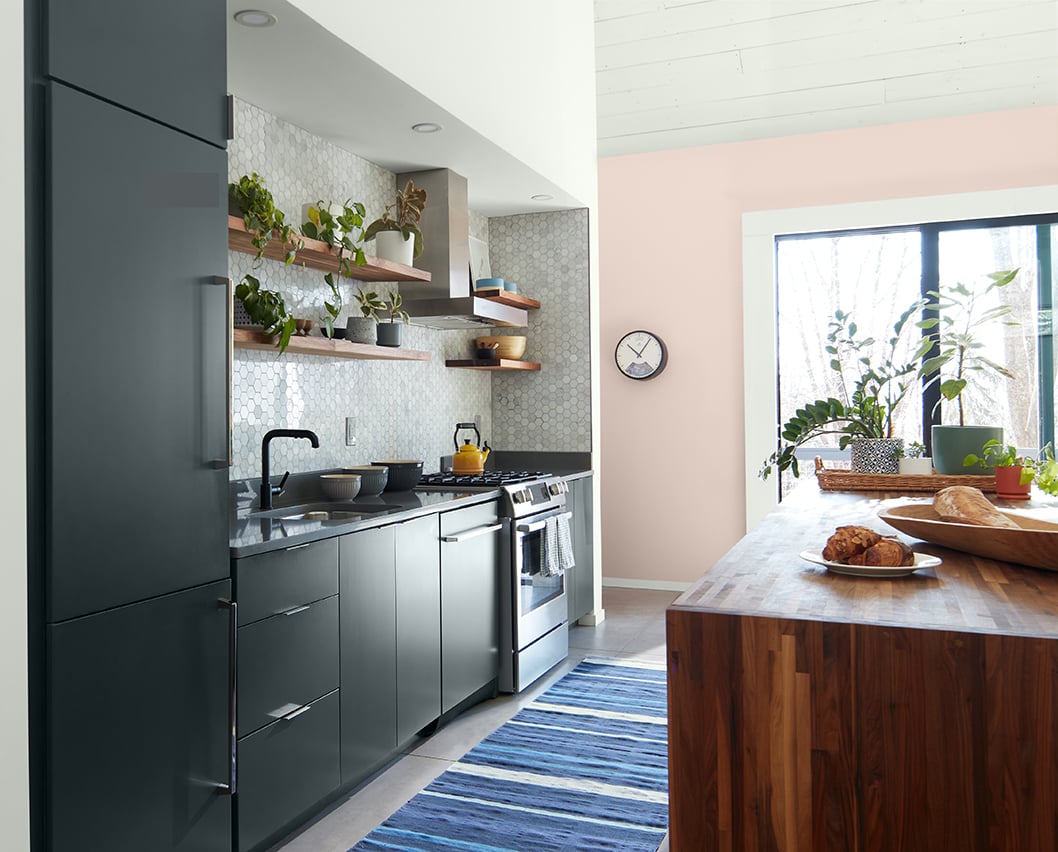
It’s time to enjoy your new kitchen! If you need to drill new holes for new hardware, make a cardboard pattern to help align them correctly. Install the hinges, then hang the doors and replace the drawers. This kitchen island looks fresh and modern with a satin paint finish in Benjamin Moore’s Caribbean Blue Water.
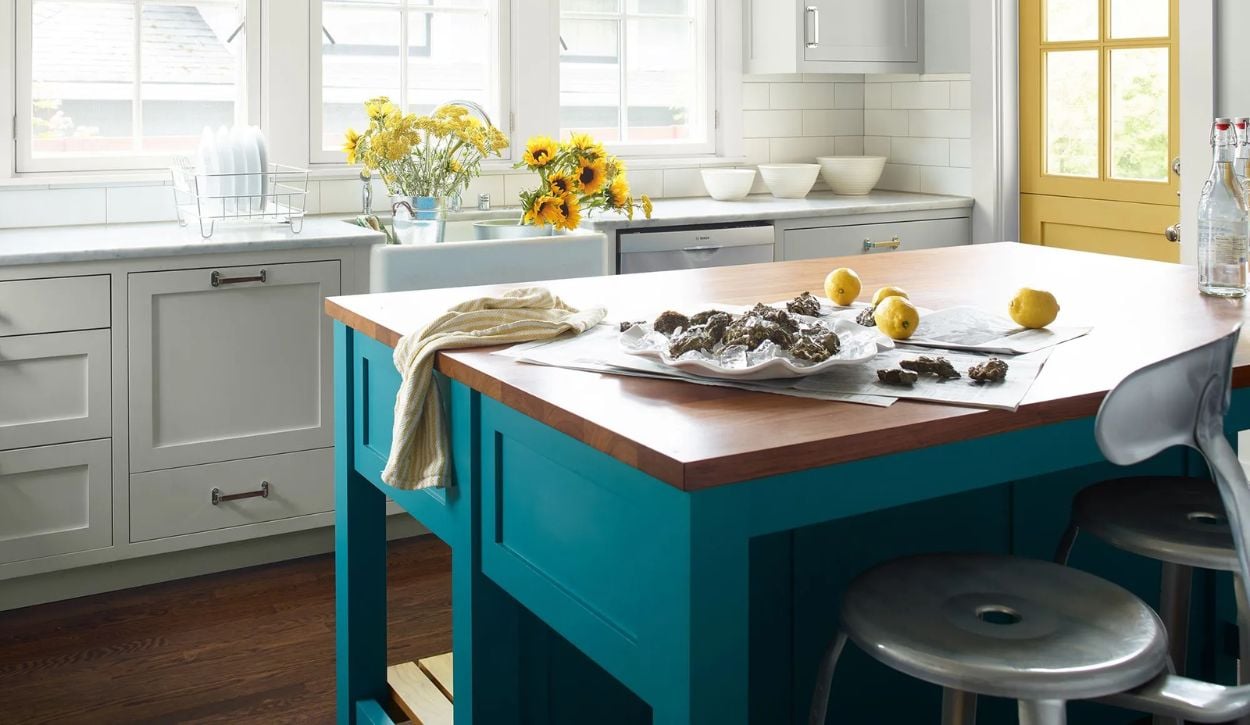
Kitchen cabinets in Gray Owl ADVANCE Interior Paint - Satin, Island in Caribbean Blue water ADVANCE Interior Paint
Where to Buy Kitchen Cabinet Paint
Ring’s End carries ADVANCE paint, as well as a wide selection of Benjamin Moore paints in-store and online, shipping anywhere in the U.S. For more helpful tips on selecting paint colors, check out our guide to Kitchen Color Schemes.
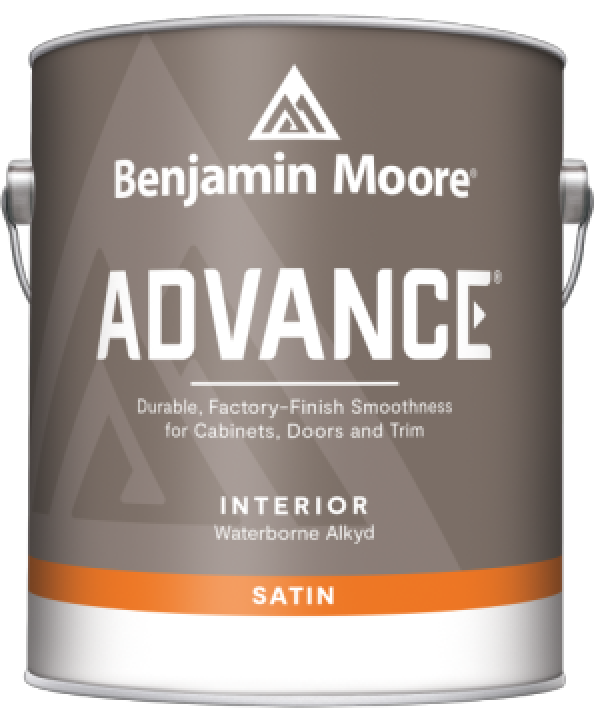
Best Kitchen Cabinet Paint: Benjamin Moore ADVANCE
Benjamin Moore ADVANCE offers a lot of bang for your buck, with smooth application and a hard finish that holds up over time. Available in 3,500+ authentic Benjamin Moore colors, it's no surprise ADVANCE is our paint experts' top choice for kitchen cabinets!

