


Always here to provide our expertise, this is a definitive caulk guide. You will learn the basics of caulking, what caulking is, caulking tips, types of caulk, and what they’re used for, how to apply caulk, and how to use a caulk gun.
Let’s get started. What is caulking anyway? Caulking is the process of sealing joints, seams, and gaps during the building process. It serves many purposes such as creating a waterproof seal for moisture prevention, increasing your home’s efficiency with insulation, and working to create a seamless look by filling in the small gaps in mouldings, trim, or baseboards.
Caulking Tips: How to Choose the Right Type of Caulk
There are many instances during a project or repair when you will need to caulk and it's important you are using the right caulk product for the task at hand. There are a few things to keep in mind when you are deciding which type of caulk will provide the best solution to your need, (see our tips for caulking below to help you in your decision.)
The types of caulk covered in this article are composed of different materials, which dictates which substrate or surface the caulk adheres to best. Examples of caulk materials are latex or acrylic, silicone, and adhesive; there are also an abundance of specialty caulks designed to adhere to brick or stone, concrete, or metal joints.
Another thing to consider when deciding which caulk is best for your project is the amount of moisture it will be exposed to. For example, in areas that stay wet such as a bathroom countertop or in the kitchen near a sink, it is important to use a type of caulk highly resistant to water and mildew.
Temperature is another factor to keep in mind. This is not only important for application, as some caulks can only be applied in warm temperatures, but also for durability, as some caulks cannot handle a lot of ups and downs in temperature due to their lack of flexibility.
That leads us to location, when caulking outdoors, you will need to choose a type of caulk material that will adapt to the elements and is flexible enough to withstand movement in the joint. Specialty caulks are designed to withstand a large range of temperatures because they have extreme flexibility, while others aren’t.
It is also important to keep in mind the end result of a finished product. If your caulk will need to be painted, you need to make sure you have selected a type of caulk with this ability. While most caulks can be painted over after they have cured, others cannot.
Lastly, consider your level of application skill when making a decision on what type of caulk is best. Some caulks are easy to apply and can be cleaned easily with soap and water. Other types of caulk are messier to work with and require the use of solvents in clean-up. If odor is something that bothers you, please be aware several caulks have a strong odor while curing and a few even release noxious fumes.
Caulk Gun Basics: How to Use a Caulk Gun
For the correct application of any type of caulk, you will need a caulk gun. There are a few different types but for most projects, a manual caulk gun will work. This is the most affordable option and best for homeowners, it should suffice for any DIY projects. The caulk gun is necessary for using the large caulk cartridges. The cartridges are generally made of disposable plastic or cardboard and are for one-time use.
To insert the caulk tube into the manual caulk gun, place the tip of the nozzle into the front of the sleeve and the rest of the tube will fit into the metal housing of the caulk gun.
Some caulk guns have a built-in cutter that will cleanly snip the tube in precisely the right location when squeezing the gun’s handle. If your caulk gun does not have this feature, you can puncture or cut the top of the tube yourself. The size of the caulk bead you get will be determined by where on the nozzle you cut, the further down the larger the size. Some models may come with a convenient nozzle cutter or a swing-out wire puncture tool for caulk tube seals.
With a manual caulk gun, the caulk is dispensed when you pull the trigger which activates the plunger to smoothly squeeze the tube and push the caulk toward the surface and out onto your project material.
How to Apply Caulk
To ensure your caulk is applied correctly and works properly, follow the steps below before starting your caulking job.
1. First, it is important that all old caulk is removed before applying a new layer. You can do this by using a caulk-removal tool, scraper, or utility knife. After the old caulk is removed, clean the surface by wiping it down. If you find there are stubborn materials such as old caulk, paint, or mold that you can’t easily remove, try using a wire brush and caulk-removing solution.
2. To ensure your caulk looks good and follows a straight line, use a piece of painter’s tape on each side of the gap. After the caulk is applied and smoothed out, you can peel off the tape to reveal a consistent finish. 3. To load your caulk gun, press the release at the rear of your caulk gun and load the tube into the gun with the nozzle at the front. Once you push the plunger back in to secure the tube, you are all set.
4. Start by cutting the nozzle at a 45-degree angle, equal in width to the gap you are planning to fill. If you cut too wide a hole it will not only waste your caulk but makes the bead more noticeable and harder to smooth out once applied. Avoid applying excess caulk if you can. If you want to test the bead size to ensure it’s the correct size, you can do so on a newspaper, paper towel, or another disposable surface.
5. Puncture the seal on the tube using the punch on the caulking gun, edge of a razor blade, or a nail.
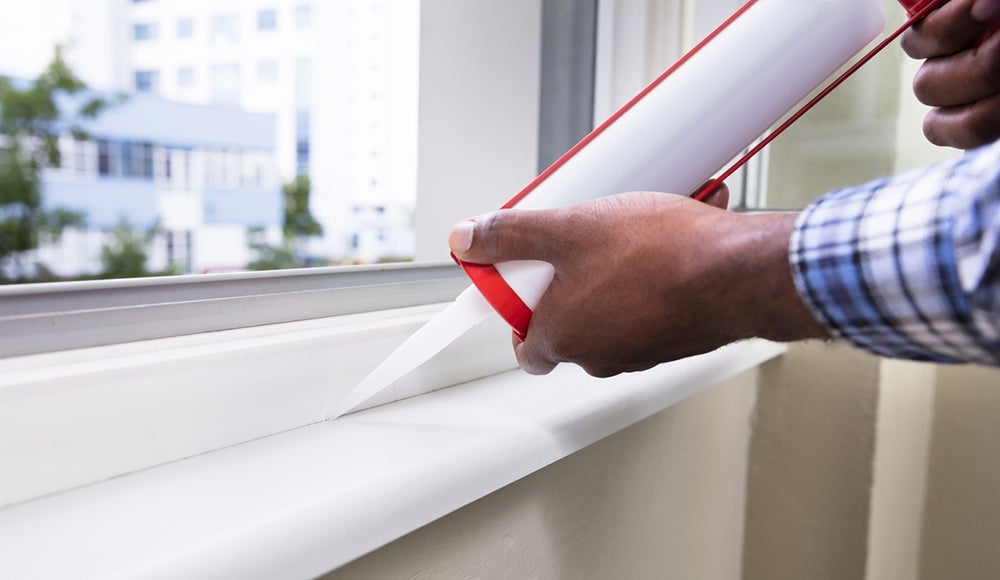
6. Place the tube in the gun and push the plunger until it makes contact with the membrane. Squeeze the trigger with steady pressure until caulk starts to come out of the nozzle. Put the nozzle in the gap and pull the gun slowly toward you at a 45-degree angle while pushing the trigger. The bead should contact both sides of the joint and fill the gap with a nice line of caulk.
7. Newly applied caulk needs to be “tooled” which is passing over the entire applied bead of caulk to smooth it and also make sure it is in the gap between your substrates. You can do this with your finger (make sure you’re wearing a glove), damp rag or a special caulk smoothing tool.
8. Remember to clean up your work area, Most caulks can be washed away with soap and water, but read the instructions on your caulk tube to make sure you are using the right materials as some require a mineral spirit.
9. To store extra caulk for future use, you can plug the tube with a caulk tube stopper or place a nail at least 2 inches into the nozzle of the tube. Then use aluminum foil or plastic wrap to wrap the nozzle. Storing properly will prevent you from having to purchase new caulk for your home improvement projects.
Types of Caulk and When to Use Them
Like most things in home improvement, there are specific products to be used with specific materials. When it comes to caulk, you will find there are many types, all designed for a different purpose and to provide a specific solution. Check out these four options so you can choose the right caulk for your project.
Acrylic Latex Caulk
If you are looking for an all-purpose caulk for sealing a wide variety of interior and exterior surfaces, an acrylic latex caulk is a great solution. This product resists cracking and chalking, is low odor, and easily cleaned up with water. It can also be painted with latex and oil-based paints. This type of caulk is most effective on small cracks or masonry. However, it is not recommended for areas prone to water such as a shower stall as it is not mildew and mold resistant.
Acrylic Urethane caulk sealant is a one-component that offers extreme flexibility and performance. This particular product is recommended for use on many surfaces such as wood, vinyl or aluminum, concrete, masonry, and cement as it is moisture resistant. It can be used in indoor or outdoor environments and is also fire and high heat resistant with low VOCs. This type of caulk can also be painted once it is applied.
Siliconized Acrylic
If you are looking for a durable and quick drying caulk, Siliconized Acrylic is a good option. This performs better than Acrylic and Vinyl as it has more flexibility and can endure moderate temperature changes. This sealant is best used on windows, doors, siding, mouldings and trim. It can be applied on surfaces such as masonry, concrete, ceramic, tile, brick, wood, and metal. It can be used on both interior and exterior projects and be painted only 30 minutes after it's applied. Siliconized Acrylic caulk delivers good adhesion and durability, is easy to apply, and simply cleaned with soap and water.
Silicone Caulk
Silicone caulk is also available as an option as it adheres to most wood, vinyl, and metal siding, masonry, brick, concrete, drywall, plaster, glass, and plastic. Silicone caulk is flexible, waterproof, crack, and shrink resistant. However, it is not paintable and tends to yellow over time. Once cured, silicone sealant is mold and mildew resistant and can be exposed to water in as little as three hours.
Lexel Elastic Sealant
One final option is a specialty or modified caulk, Lexel Elastic Sealant. This is the duct tape of all caulks. It has extreme elasticity; superior adhesion and it is paintable. It seals any perimeter such as a tub, shower stall, sink, countertop, window and door frames, and PVC and metal pipes. This product can be applied to wet or dry surfaces, indoors or outdoors. It holds up well and survives routine scrubbing with household cleaners, including abrasive cleaners. It also performs with an ultra-clear finish and will not yellow or get cloudy. With all this information, you should be more informed about caulk basics, how to apply caulk using a caulking gun and which type of caulk is best for your project. You are ready to caulk like a pro!