

Before you venture into waterproofing your basement, you should understand why it might be wet in the first place. Because most basements are below grade (ground), they are more prone to moisture problems and water damage. Here are some common reasons why you may end up with a damp basement:
-
Cracks in your house's foundation are a surefire way for water to seep in through your basement walls and floors.
-
Basement doors, windows, egress windows, and window wells that aren’t secure are other paths for water seepage.
-
Inadequate drainage is a significant cause of a wet basement. When rainwater is not properly directed away from your home, it will sit at the house’s foundation and seep into the basement. Homeowners should consider installing drainage systems like French drains and drain tiles to effectively manage groundwater and prevent water from entering your basement. These systems help maintain a dry basement environment.
-
Improper drainage can be the result of a poor drainage system, improperly installed or clogged gutters, or even sloping around your home. If your land is sloped toward your home, water will run toward and accumulate around your house’s foundation.
Ring's End carries premium products to waterproof your basement. Depending on your level of expertise and the basement water issues you are experiencing on your property, hiring a professional to do the work may be appropriate. This article is intended as a guide for the DIY'er.
Interior Waterproofing Your Basement Walls and Basement Floor
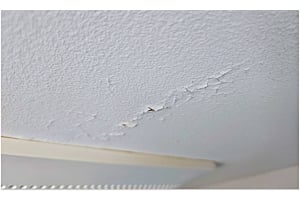
The foundation is said to be the strongest part of any home. But as a house’s foundation walls shift shifts and settle into the earth, cracks will inevitably develop, and water can seep in, resulting in a wet basement. These foundation cracks can typically be fixed with easy DIY basement waterproofing solutions. There are undoubtedly exterior waterproofing instances where a contractor may be required to repair significant foundational damage, or a landscape architect/civil engineer would recommend regrading your yard and/or redesigning your drainage system. However, here, we’ll focus on interior waterproofing that you, as a homeowner, can do yourself to achieve a dry basement.
Before You Begin
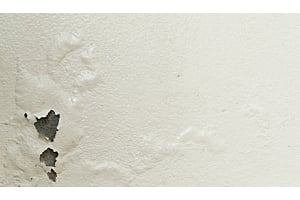
First, you'll want to clean up the areas you'll be waterproofing. Many of the waterproofing products listed below will only work if applied directly to the substrate, so any existing coatings on the surface, wall, or floor must be removed. Old paint can be removed with a wire brush, sandblaster, or other methods. Please get in touch with one of our Paint Centers for advice on how to best remove old paint safely, as you must always wear proper protective gear when removing paint. Wash the walls of dirt and dust using a scrub brush and warm water with a little bit of dish soap. If you see any mold, you can add bleach to the solution (1 cup of bleach per gallon of water). However, first check the ingredients in your dish soap, and do not mix bleach with any products containing ammonia! After washing the walls with warm water, let everything dry thoroughly before moving on to the next step.
*If you see any white, powdery, crystal-like powder on your masonry walls, that is efflorescence and needs to be removed with DRYLOK Concrete and Masonry Liquid Etch & Cleaner or muriatic acid. Please refer to the manufacturer's directions before using.
Step 1: Clean the Area
First, you'll want to clean up the areas you'll be waterproofing. Many of the waterproofing products listed below will only work if applied directly to the substrate, so any existing coatings on the surface, wall, or floor must be removed. Old paint can be removed with a wire brush, sandblaster, or other methods. Please contact one of our Paint Centers for advice on how to safely remove old paint, as you must always wear proper protective gear when removing paint. Wash the walls of dirt and dust using a scrub brush and warm water with a little bit of dish soap. If you see any mold, you can add bleach to the solution (1 cup of bleach per every gallon of water). However, first, check the ingredients in your dish soap, and do not mix bleach with any products containing ammonia! After washing the walls with warm water, let everything dry thoroughly before moving on to the next step.
*If you see any white, powdery, crystal-like powder on your masonry walls, that is efflorescence and needs to be removed with DRYLOK Concrete and Masonry Liquid Etch & Cleaner or muriatic acid. Please refer to the manufacturer's directions before using.
Step 2: Plug Holes
For any holes, use hydraulic cement, such as DRYLOK Fast Plug, to plug any apparent holes and large cracks. Hydraulic cement seals cracks and holes in masonry and prevents water from flowing through them, even under pressure. DRYLOK Fast Plug will set and harden very quickly in 3-5 minutes, so have a plan before you start! Use a trowel to smooth the cement before it sets.
Step 3: Fill Cracks
Fill smaller cracks with a Masonry Crack Filler.
Step 4: Seal Openings
Use caulk to seal doors, windows, and window wells. We recommend an elastic sealant such as Big Stretch Sealant or Lexel Sealant, both of which are waterproof and flexible.
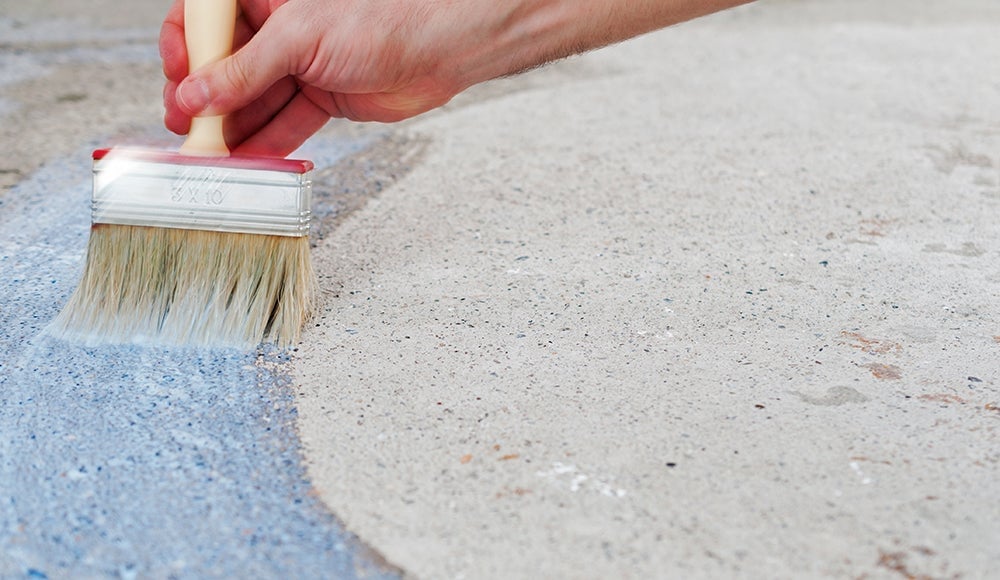
Step 5: Apply Waterproof Coating
After your holes and cracks are sealed, use a waterproof coating on your basement surfaces. DRYLOK Clear Masonry Waterproofer is an excellent product that is guaranteed to protect walls and floors against hydrostatic pressure and water seepage. DRYLOK Masonry Waterproofer also comes in white and gray, but these two can only be used on walls and not on floors. Apply the concrete sealer with a quality nylon bristle brush or 3/4" nap roller, and make sure to work it into the pores of the masonry. Proper coverage and a minimum of two coats are required for warranty waterproofing. Read all manufacturer guidelines and instructions before applying.
*PRO TIP: Tape along the concrete floor 1 inch out from the base of the wall, and paint DRYLOK on the walls, along the seam between the wall and the floor, and on the floor up until the tape. This will help prevent water from migrating down the exterior of the foundation and through the seam.
Basement Waterproofing Tips
-
Don’t perform any crack repair or sealing until all standing water is first removed from your basement floor.
-
Consider running a dehumidifier in your basement to reduce condensation. This will help prevent mildew and mold growth.
-
If your dryer is in your basement, be sure that it's correctly hooked up to the vent and that you don't feel any air leaking around the hose. The hot, moist air from the dryer can cause condensation if it's not venting correctly.
-
Another source of condensation in your basement may be sweating pipes. Check that your pipes are adequately insulated with this guide: How to Insulate Pipes and Prevent Pipes from Freezing.
-
You can paint over DRYLOCK Waterproofer, and we recommend a waterproof paint that will perform in high-humidity environments, such as Benjamin Moore Aura Bath & Spa.
Exterior Waterproofing
Exterior waterproofing your home can be a big undertaking, and we recommend hiring a contractor or landscape architect for a consultation if you believe there are serious cracks or deficiencies in your concrete walls or if you have groundwater pooling around your house. However, there are easy do-it-yourself fixes that you can try before excavating your yard!
-
Don’t plant flower beds or bushes that require watering too close to your house.
-
Ensure your gutters are clear and flowing properly to keep water away from your house. Check out our guide on gutter guards and how to adequately protect your gutters: Best Gutter Guards to Protect Your Gutters.
-
If your walkway or patio is sloped toward your house, they can contribute to water pooling around your foundation. You may be able to re-level the slabs so that they drain away from the house instead of toward it.
Preparing for Basement Floods
One last thing you may want to consider adding to your basement waterproofing system is a sump pump. If your house is located on a high water table, some basement flooding may be inevitable during heavy rainstorms. A sump pump can either be above or below (submersed into) your basement floor and pumps out and discharges water from inside to outside.
Does My Crawl Space Need to be Waterproofed Too?
If your house has a basement crawl space, it is also necessary to seal the interior and exterior walls and any crawl spaces that may allow for water seepage.
When Should I Call a Professional Basement Waterproofing Company?
If you're unsure of how deep the damage goes and whether or not you can properly fix the water problems yourself, calling a professional waterproofing expert in your area may give you peace of mind.
Many waterproofing service companies offer a free inspection to tell you the extent of damage and the cost of repair services. If they find that your home has extensive basement leaks that have caused major structural damage or your basement is in need of foundation repair, it may be best to have a professional handle the work.