

Whitewash brick exterior finishes have become increasingly popular over the last decade as people invest in older homes that are ripe for remodeling. Split-level, mid-century ranch, and colonial style homes often have red or brown brick exteriors that make the home feel dated and tired. With today’s wildly popular vintage and farmhouse home decor trends, the distressed, whitewashed look is a popular choice for brick exteriors. However, it’s important to choose the right product for a painted brick finish—regular exterior paint won’t deliver this classy effect!
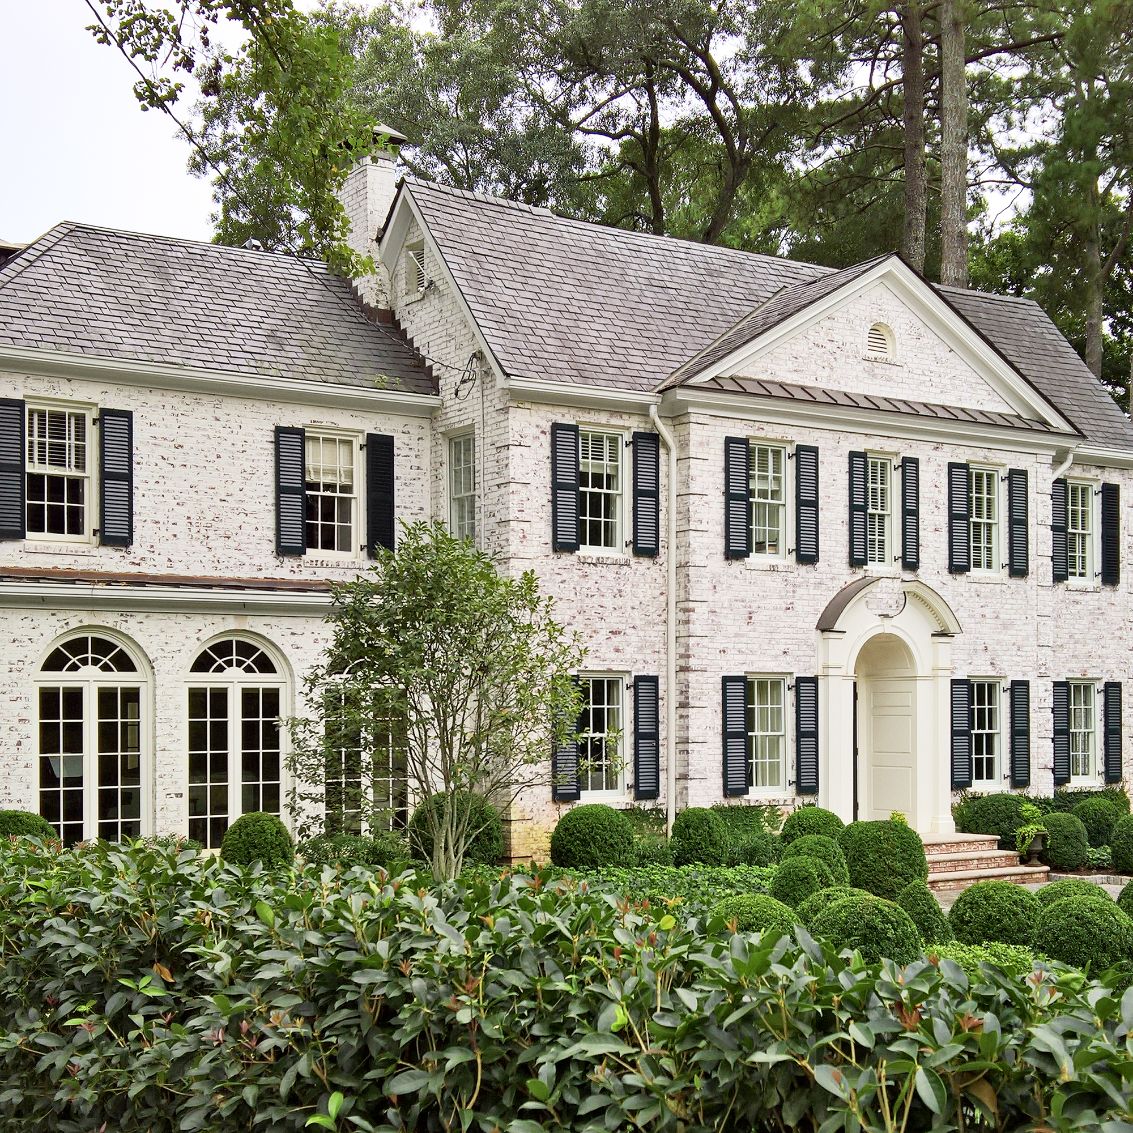
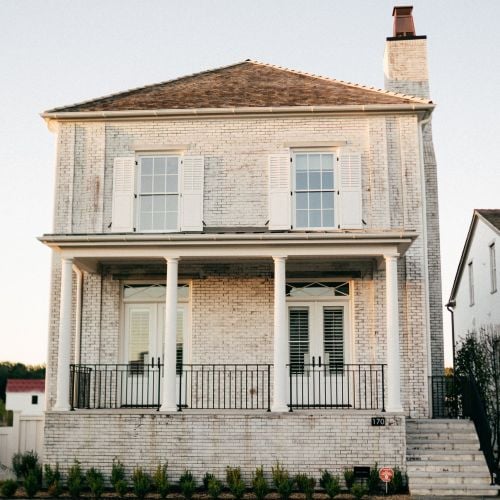
Historic brick home whitewashed in Romabio Classico Limewash Bianco White
The best way to achieve a high-end whitewash brick finish that will actually preserve and protect the brick is to lime wash the brick instead of painting it. According to the pros, the best product to get the popular German Schmar effect (but with far less work!), is Romabio’s one-coat Classico Limewash.
Keep reading to find out more about this historic finish, and read our tutorial to learn how to whitewash a brick exterior. Romabio can be applied as a DIY project, or you can hire a trusted Pro to apply it.
What is limewash?
Limewashing brick is exactly as it sounds – applying a wash of the mineral lime, mixed with water, to protect and whiten the brick.
The whitewash finish traditionally used on stone and stucco in European villages is lime wash. Authentic limewash is made from limestone that has been slaked, or mixed with water and allowed to age for a year or two. The limestone pigments dissolve into the water and create a milky liquid whitewash. It has a high pH that inhibits the growth of mold and germs, and it promotes healthy indoor air quality because it doesn’t create fumes. This paint-like coating dates back to early Roman times, and was highly popular until about 70 years ago when it was replaced by modern paints.
Romabio Classico Limewash is an authentic slaked lime finish that is easy to use. This natural product is made from Dolomite lime from northern Italy. It contains no chemicals, is non-toxic, highly breathable, and permeable. You can order it pre-tinted or we can custom tint all Romabio products.
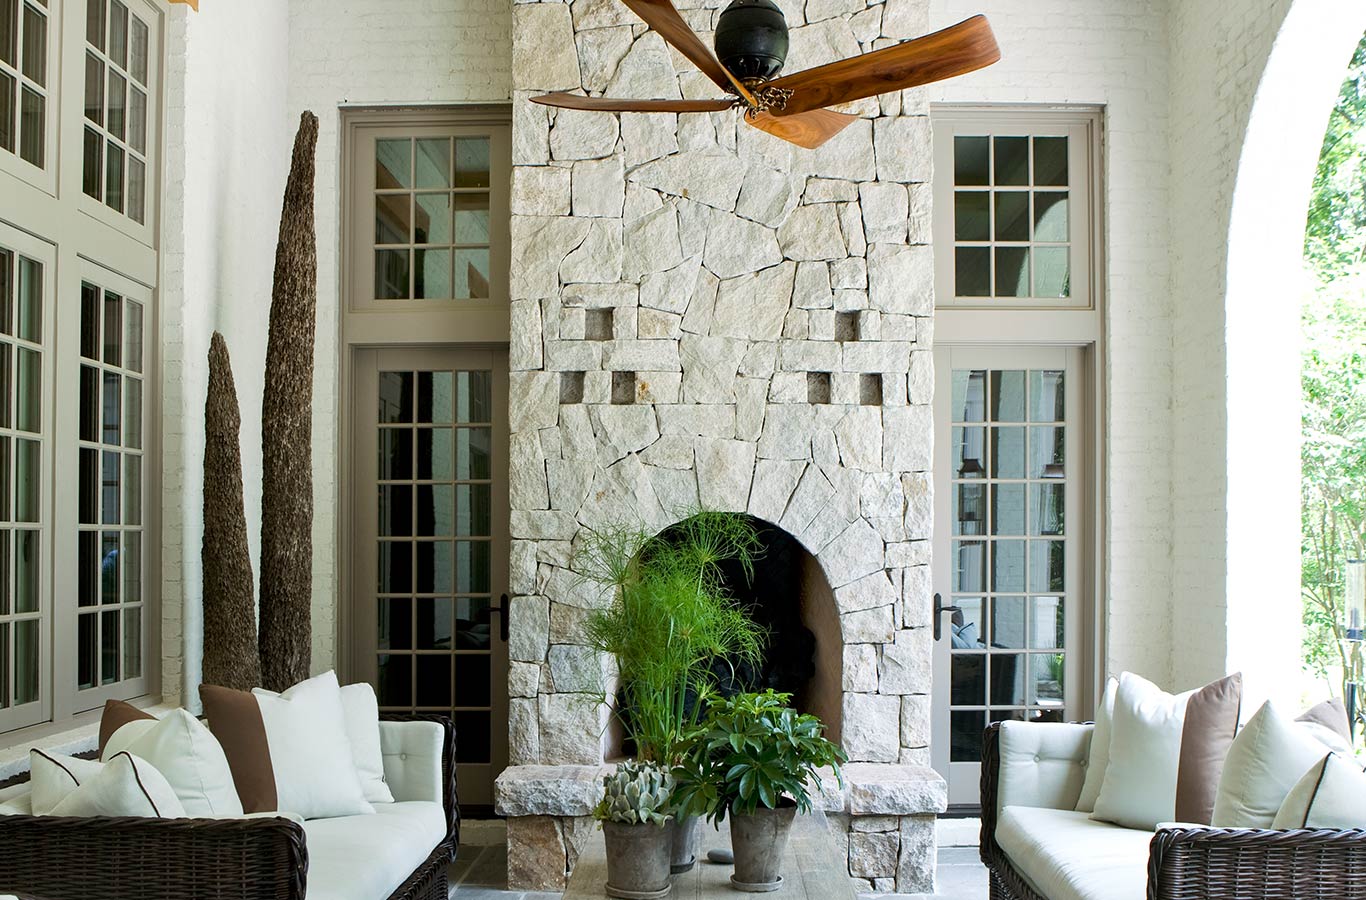
Outdoor stone fireplace whitewashed in Romabio Classico Limewash Bianco White
You can use a lime wash solution on porous surfaces like brick, stone and concrete, indoors or out. The dissolved limestone actually calcifies onto brick surfaces to create a durable finish. Limewashing brick creates a breathable, permeable coating that won’t damage the brick surface or trap moisture that can promote mold growth.
Romabio Limewash is also easy to maintain – just gently hose down with water or add a mild surface cleaner and lightly scrub soiled areas. If you accidentally scrub off some of the whitewash brick finish, you can always apply more on top.
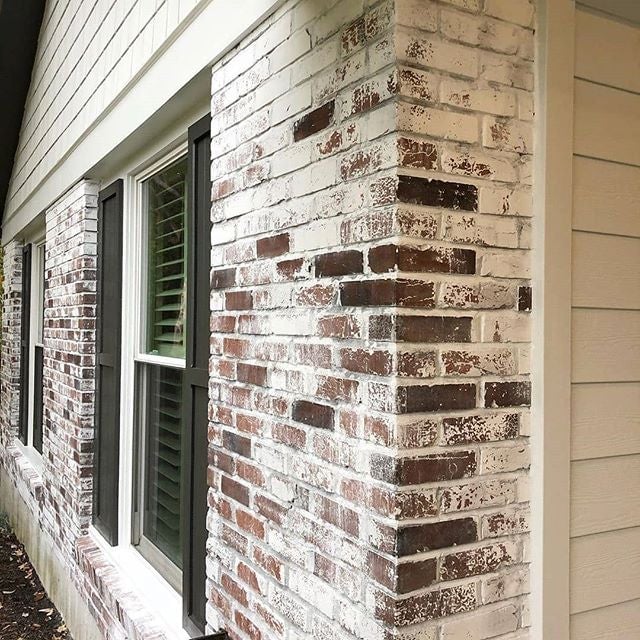
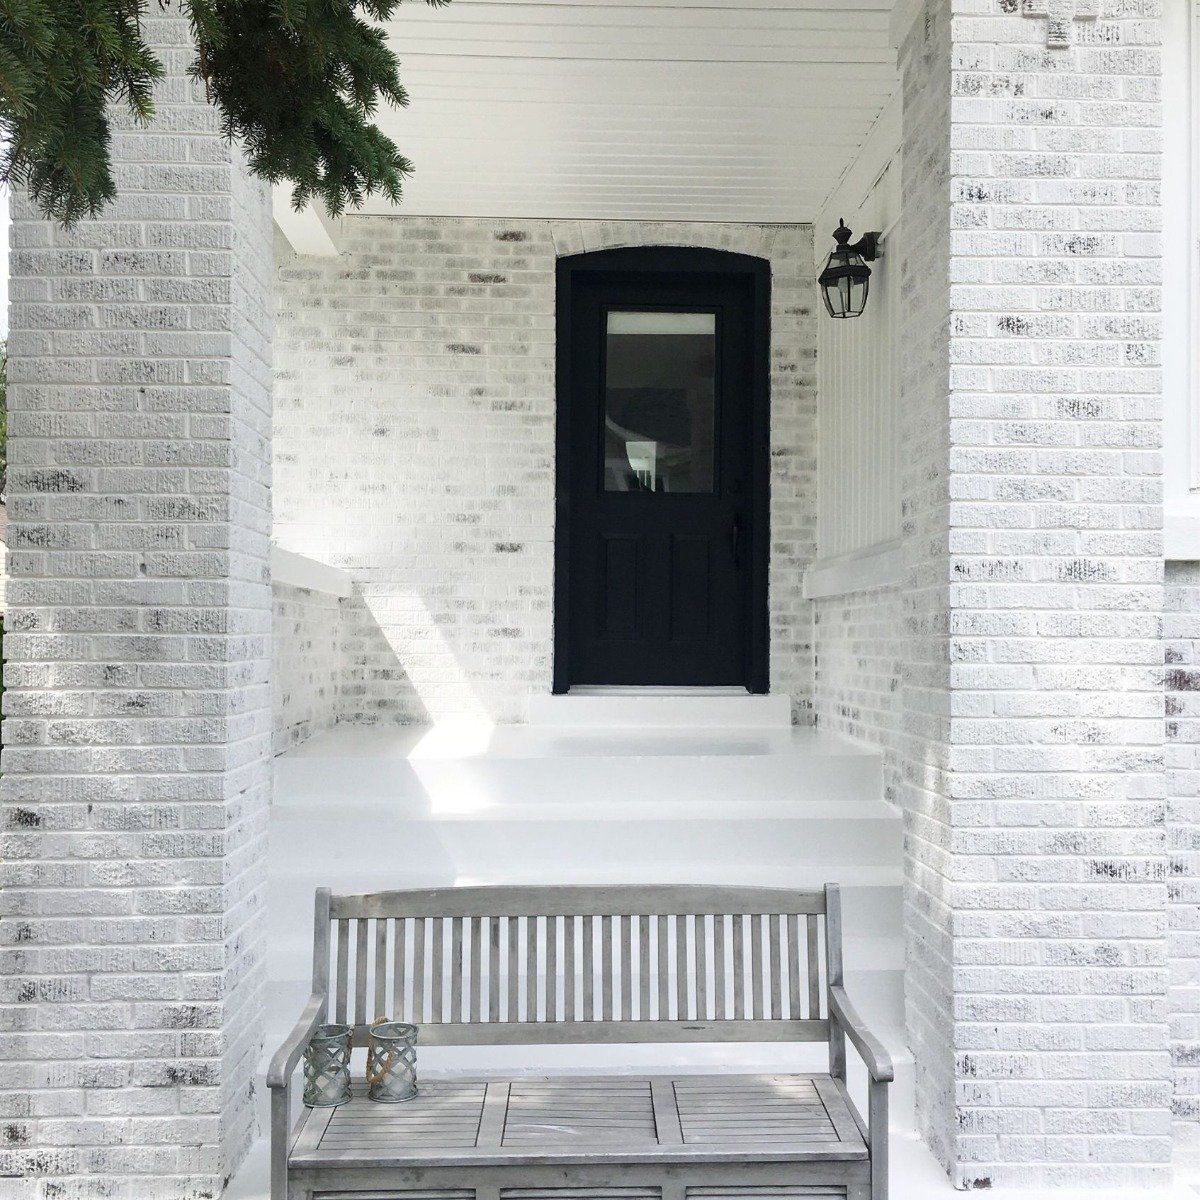
Romabio Classico Limewash with heavy distressing on exterior brick
Painted vs. Limewashed Brick Homes
Social media is full of “how to whitewash brick exterior” DIYs, but unless they specifically demonstrate limewashing a brick exterior or using a special mineral paint specifically for masonry, you should ignore them. Even though white latex paint is often used for a whitewashed look, it’s not the right whitewash paint for brick exteriors. The acrylic content of paint can trap moisture behind the brick and degrade it over time. If you want a solid painted look for your brick home, look for a breathable paint that’s especially for brick, like Romabio’s mineral-based Masonry Paint.
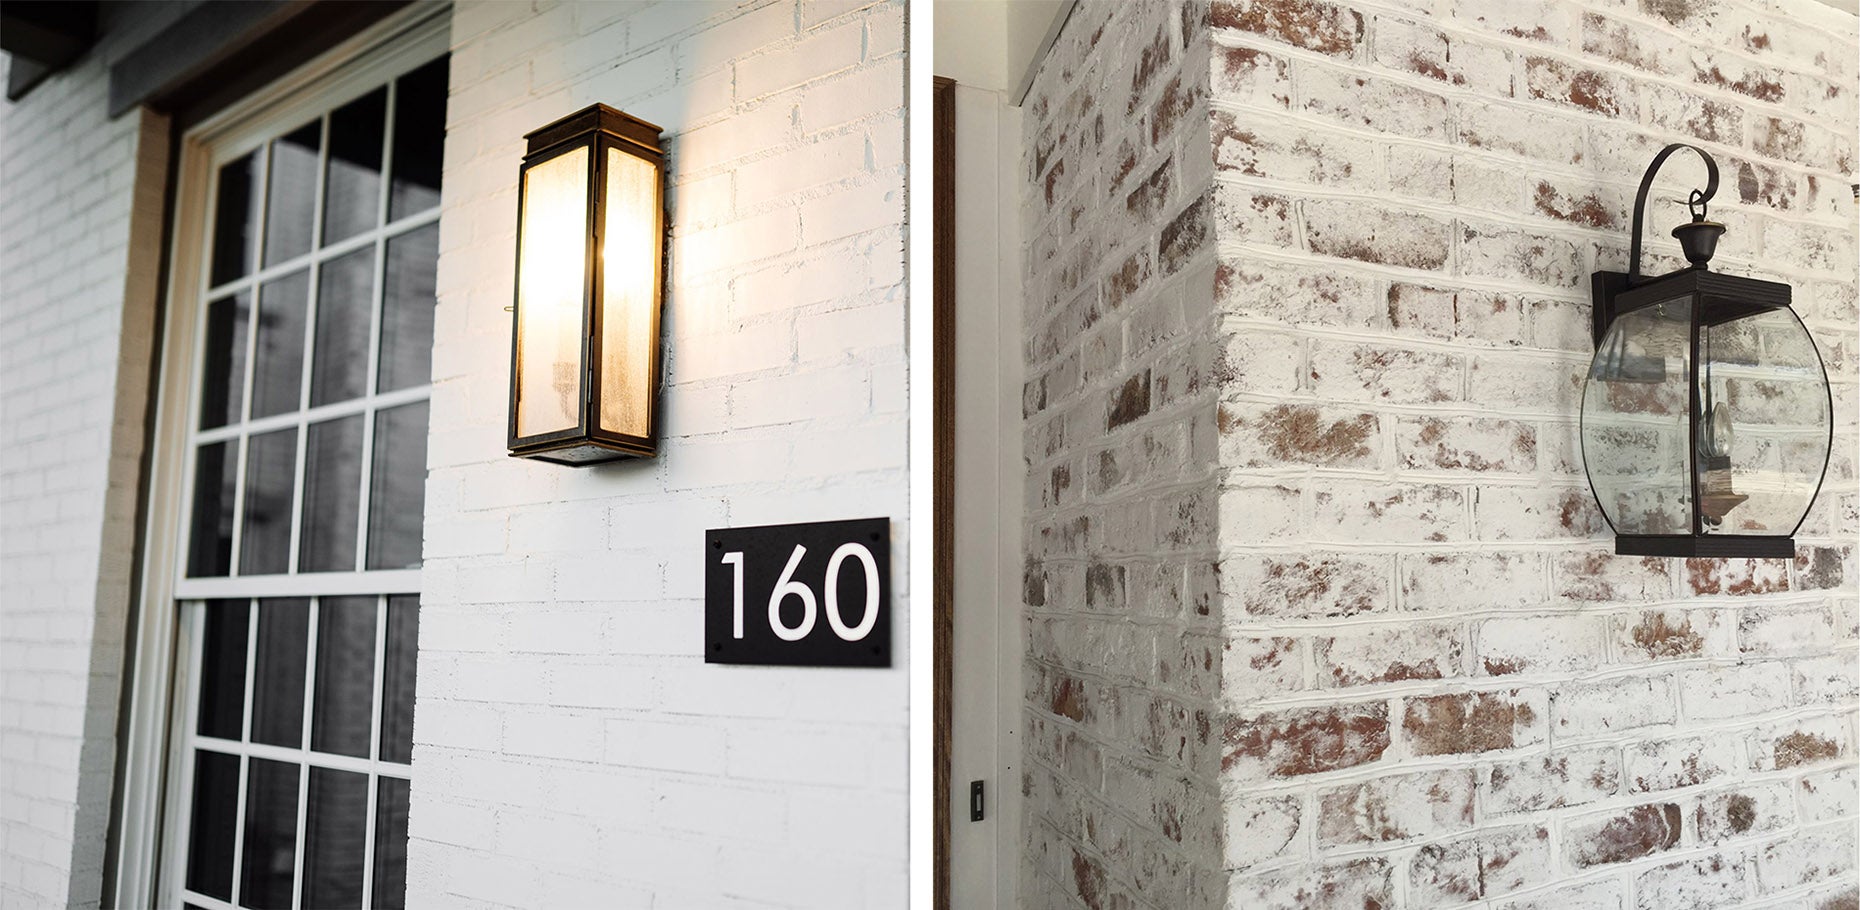
Whitewashed brick in masonry paint vs. limewash
While the permeability of limewash offers great benefits, this coating also offers superior workability. For an antique, distressed look you need to leave some bricks unpainted, and a real limewash makes it easy to do. You can remove the product to reveal just as much of the original brick color as you like. Since it stays workable for two to five days you can keep removing material, or add another coat where needed. You don’t need to be an expert decorative painter or own a paint sprayer to successfully DIY a limewashed brick home, if you use real Classico Limewash and not paint.
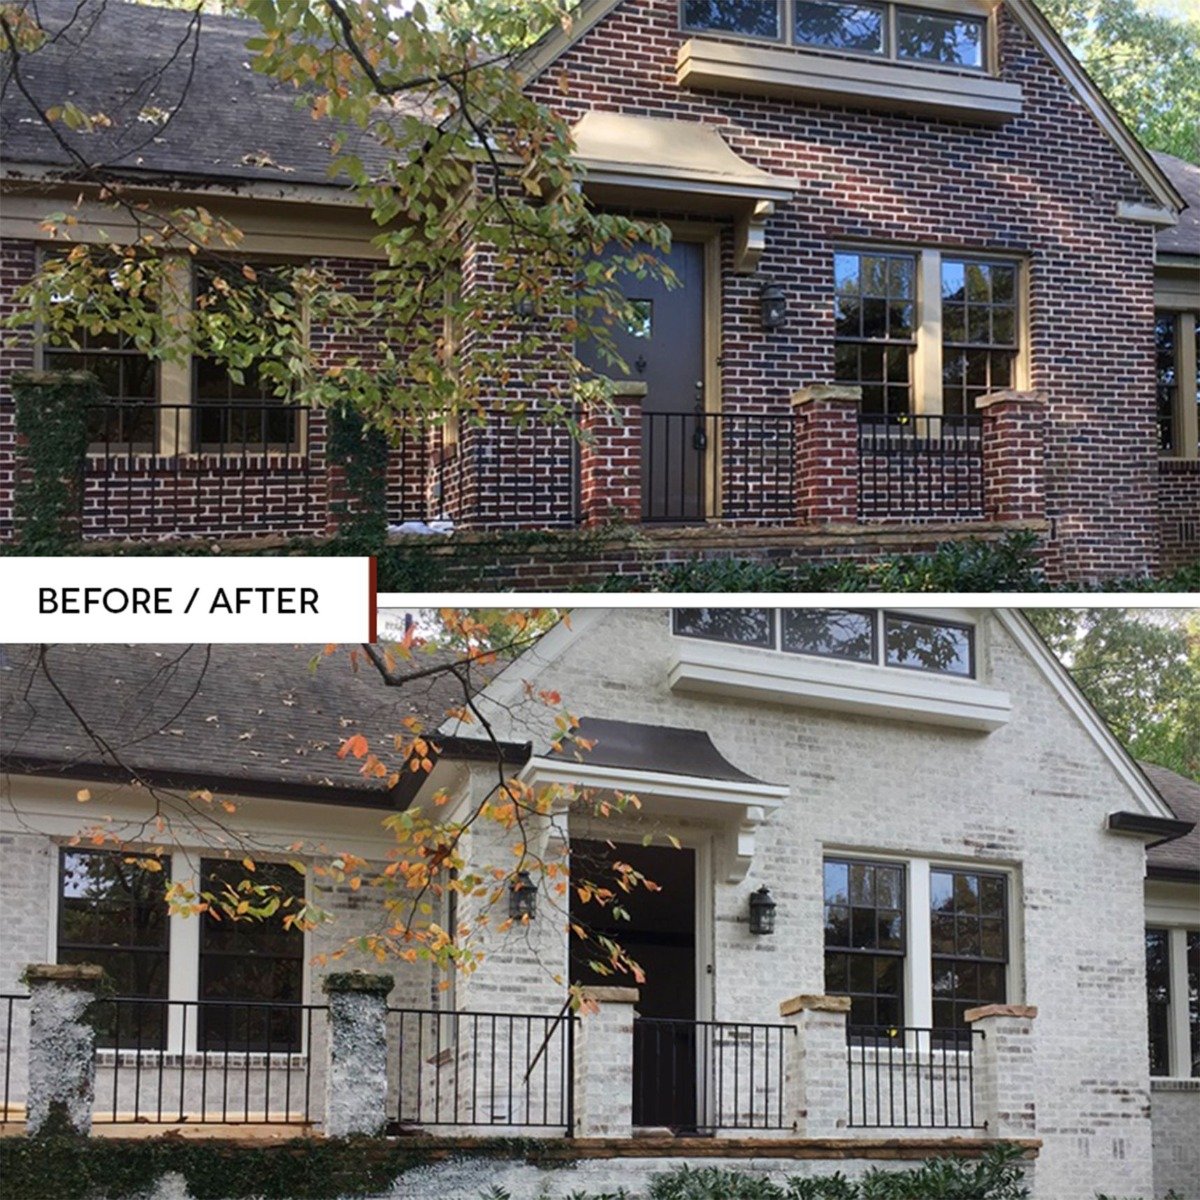
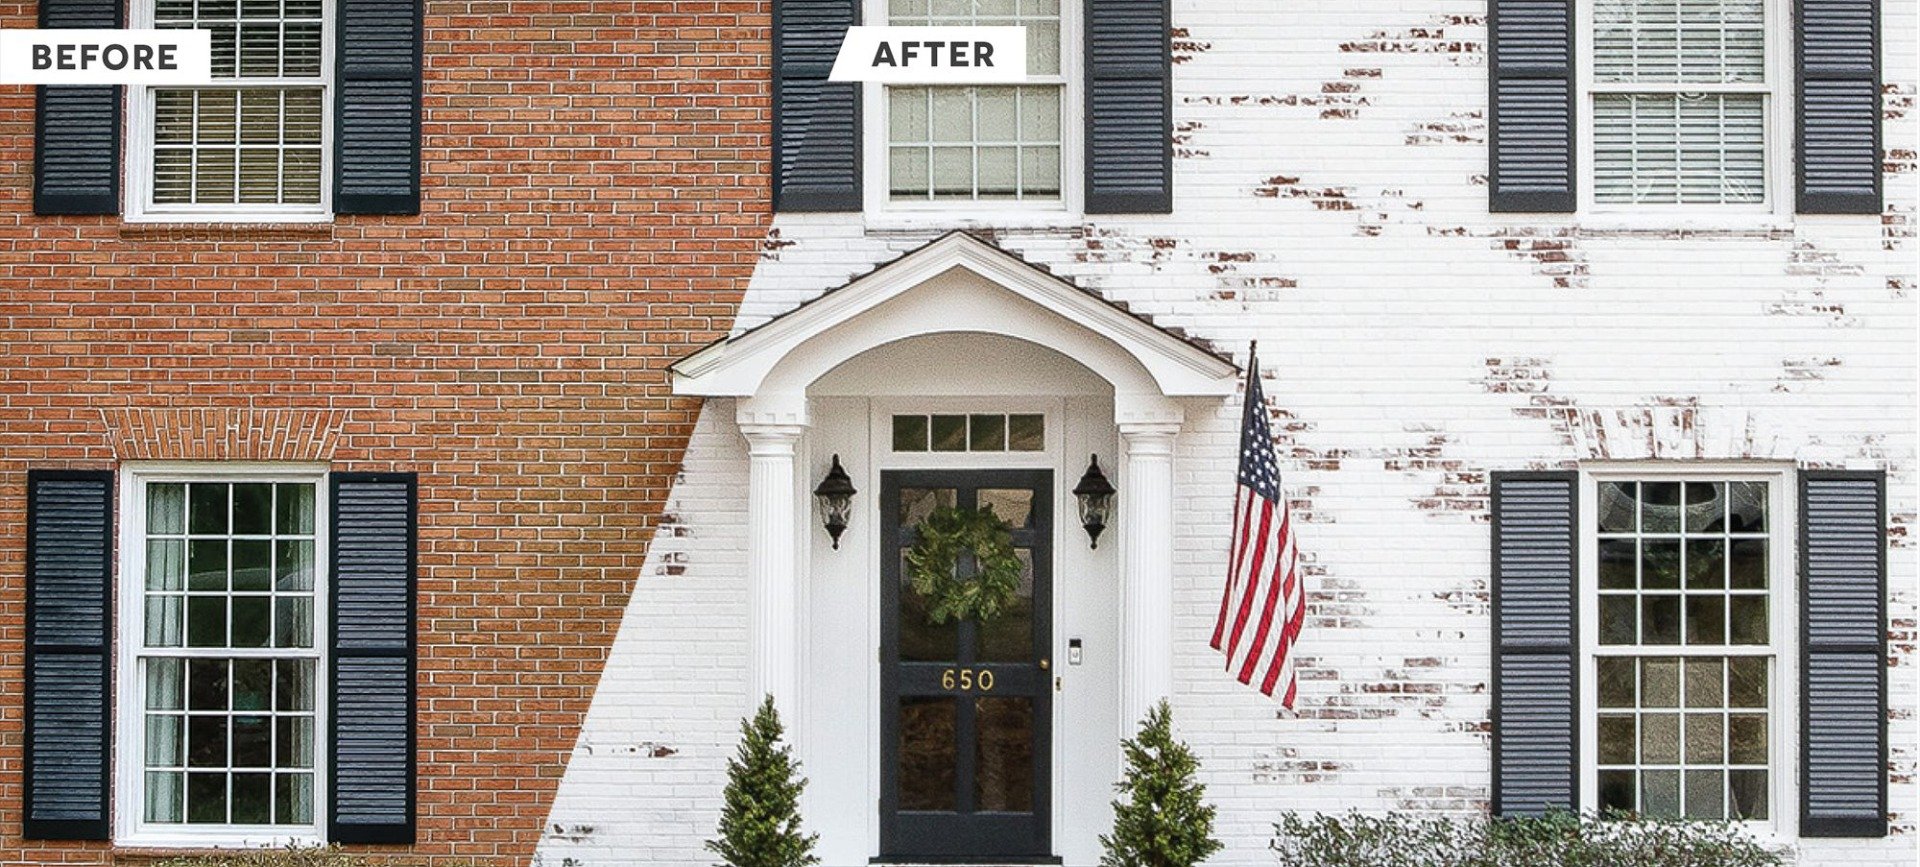
Before & After brick home whitewashed in Classico Limewash
Limewash is the ideal product to instantly update an older brick home. You can use it on interior brick too; give your living room a fireplace makeover, or update an old brick backsplash.
Learn More: How to Whitewash a Brick Fireplace
Choosing a Limewash Color
When choosing an exterior paint color it’s important to coordinate the shade with the home’s roof and trim colors. However, when choosing a shade of Classico Limewash you should also consider the color of your home’s exterior brick. You can show more of the brick as an undertone to the finish, or cover more of it for a mostly-white look. Classico Limewash comes in seven pre-mixed colors, and can be custom-tinted to match any white or off-white shade, such as a Benjamin Moore paint color.
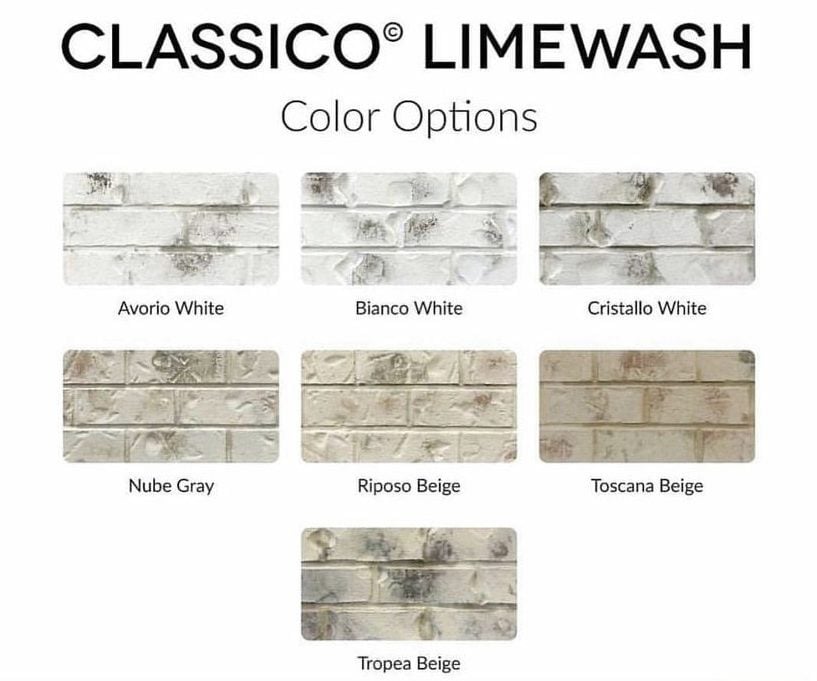
White Limewash Shades
Homes with cool gray or black tones in the roof and trim look best with either a neutral white limewash, or a shade with cool undertones. A home’s black and gray permanent features can make a warm white appear yellow or brown by contrast. Bianco White is almost neutral, with a slight hint of cool undertone to keep it from turning creamy yellow. The brightest of Romabio’s limewash shades, Bianco White is a crisp, reliably cool white that suits modern architecture.Pair it with Benjamin Moore’s Chantilly Lace paint for bright white trim.
Romabio’s cool whites complement the cooler undertones of red brick, and work beautifully with navy blue or green exterior accents.
Brick home exterior with Bianco White Limewash complementing gray and black accents
For obvious cool undertones, check out the bright cool white of Romabio’s masonry paint shade, Richmond White, or the grayish off-white of Nube Gray. Bright accent colors like blue and yellow will pop against these modern shades.
Off-White Limewash Shades
To brighten up a home with gray and brown tones in the roof shingles, or a brown shade of brick, choose an off-white with neutral undertones like Avorio White. Bright and versatile Avorio White is close to Benjamin Moore’s popular paint color, White Dove. Its complex undertones blend well with both cool and warm shades, so you can add a few black accents to update the home’s exterior.
Whitewashed brick home exterior in Avorio White with brown shingles, warm white trim, and black iron railing
Older homes with unattractive brown brick and brown shingles may seem difficult to update, but a warm white limewash can work miracles. The warm off-white of Riposo Beige instantly gives this dated split level a fresh, inviting look:
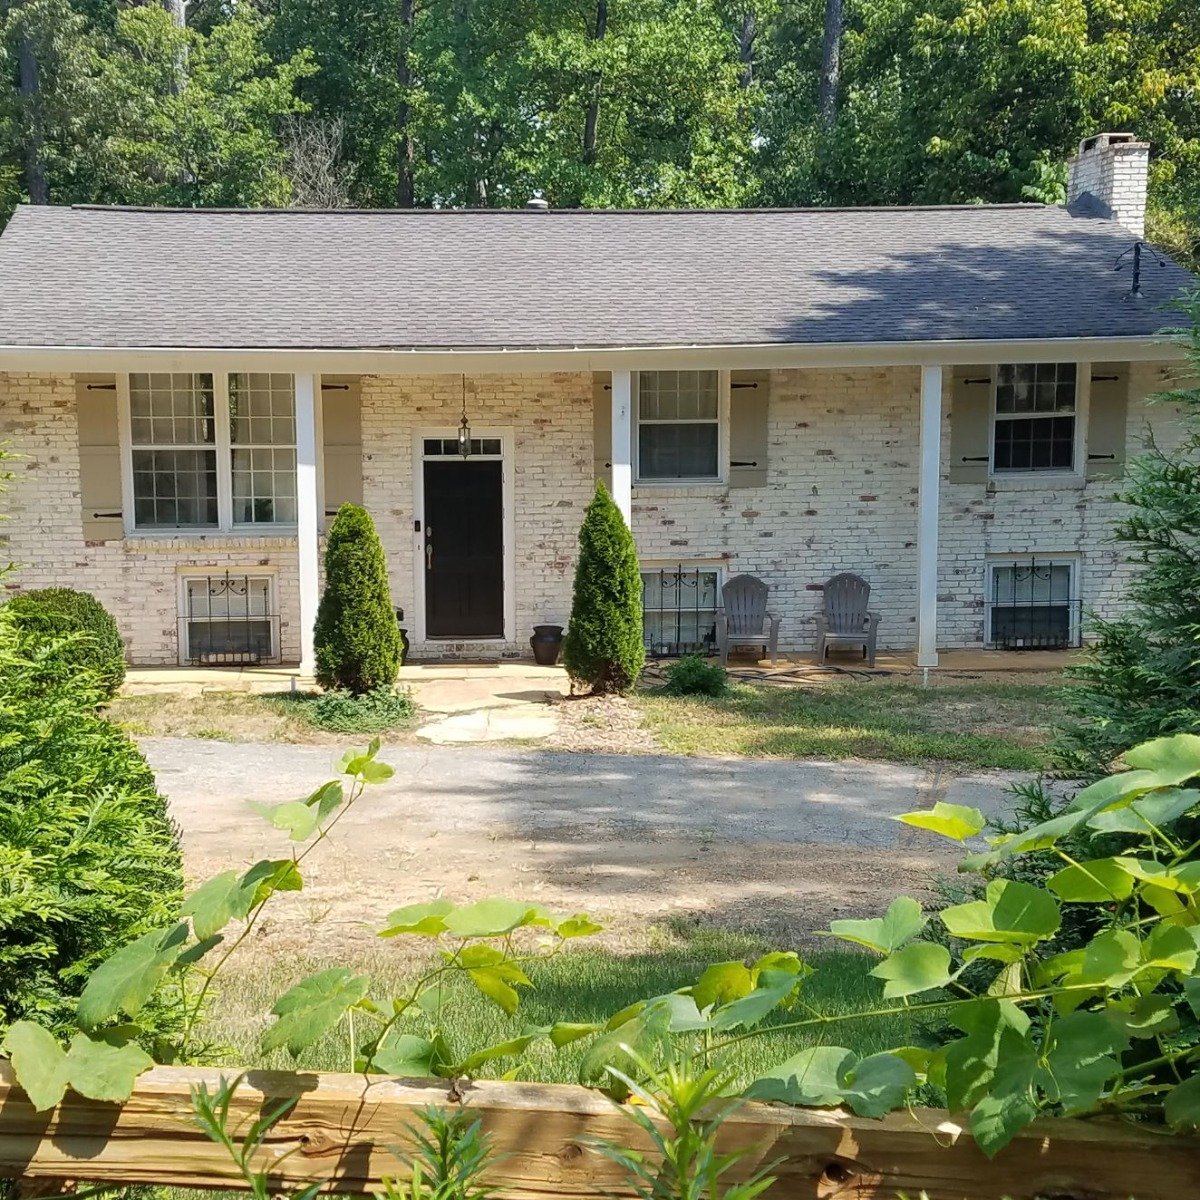
Riposo Beige Limewash updates a 1970’s brick split level home
Riposo Beige actually has a greige undertone, so it won’t look too yellow or golden beige when the project is done. This complex color works well with both cool and warm tones so you can also use it with gray or black trim. It’s an ideal color choice for the German smear whitewashing technique.
Cristallo White has creamy-yellow undertones that work beautifully with stained wood exterior trim, so it’s a great choice for rustic homes. Rich off-white limewash shades like Toscana Beige and Tropea Beige can make homes with dark brown accents look new again.
How To Whitewash Brick Exteriors With Limewash
The first thing to do before using Romabio Limewash to whitewash exterior brick is to test it and make sure it will absorb water. Because it needs to be able to bind to a porous surface, limewash won’t work on painted or sealed brick. Test the unpainted brick by spraying it with water and waiting a minute or two to see if it soaks in. If the water beads up, the brick has been sealed. If it soaks in, Romabio Limewash is perfect for your brick home.
Next, order a few 1-liter samples of Limewash colors for testing. It’s helpful to test large sample swatches right on the brick; you can easily wash off the colors you won’t be using. Paint different spots so you can see how the color looks against the roof and trim. Once you’ve chosen the color, you can tackle the job yourself or hire a Romabio PRO. Limewashing your home is an easy DIY project if you live in a one-story home. If you have two or more floors, we recommend using a Romabio PRO.
Preparing Your Brick
First, start with clean brick by hosing it down with a garden-safe cleaning solution or pressure-washing it. Clean off any grease with trisodium phosphate. Then gather your whitewashing supplies and start lime washing! Here’s what you’ll need:
-
Romabio Limewash (15 Liters covers 1200-1500 sq. ft.)
-
A large Masonry Brush (do not use a paint brush or roller)
-
A spray bottle of water
-
Clean rags or a sponge to dab and distress
-
An empty 5-gallon bucket for mixing
-
A measuring cup for adding water
-
Gloves
-
A power drill with a painter’s paddle for mixing
-
A damp towel and paper towels to clean up drips
-
Plastic drop cloth and painter’s tape to protect porch and plants
-
A scrub brush for extra surface distressing
Diluting and Mixing Limewash
Always wear gloves when limewashing brick. The product is non-toxic, but lime is a bit caustic so it’s best not to leave it on your skin very long.
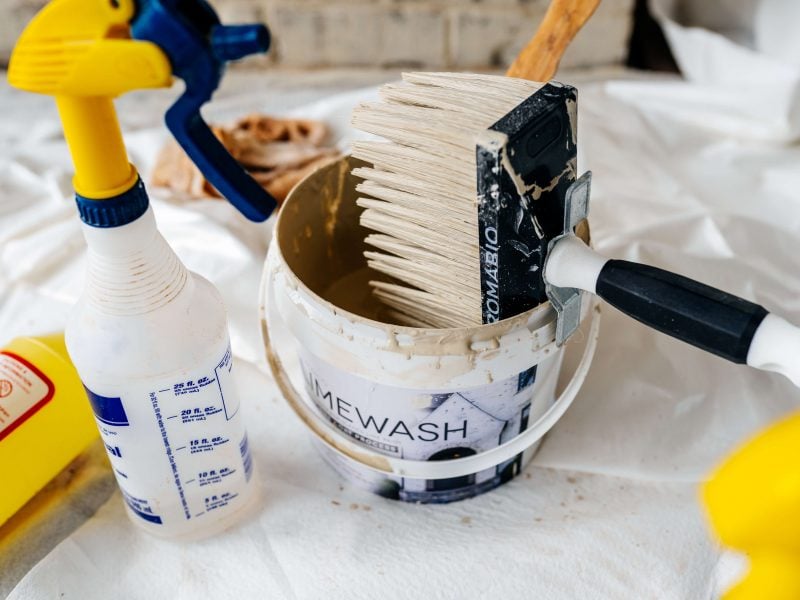
Romabio Limewash whitewashing supplies
You only need to apply one coat of Romabio Limewash. When you open the Limewash bucket, it looks like clay. Pour the Limewash into the mixing bucket and get your drill and paddle ready. You’ll dilute it with water to the desired consistency.
Most people start by diluting the Limewash 50% with water. For example, a 50% dilution would be 2 liters of Limewash and 1 Liter of water. This provides a thicker product for a more opaque look. For a much thinner whitewash you would dilute it 100% – equal parts Limewash and water. We recommend starting at 50%, testing a small area and then adding more water if you’d like. Limewash must be mixed very thoroughly, so a power drill and mixing paddle are a big help.
Stir together the Limewash and water, and keep on mixing until it’s smooth and looks like paint.
Applying the Limewash
Follow these simple steps:
-
Start by masking off and protecting nearby areas.
-
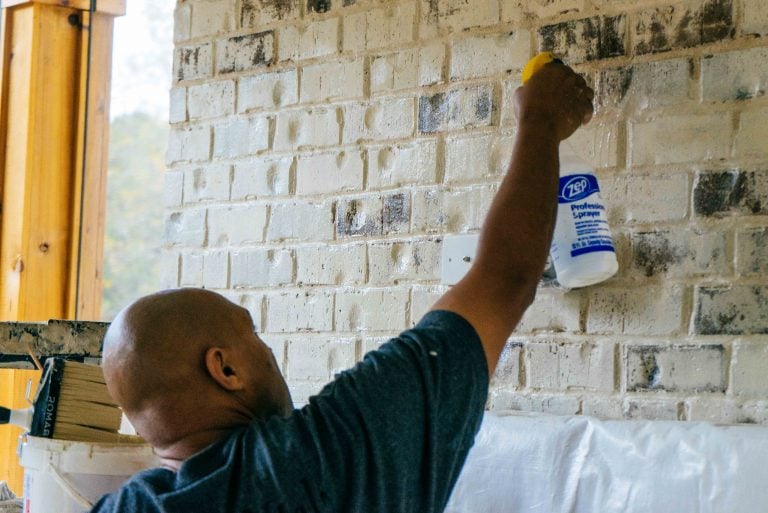
Spray a small section of brick with water; this lets Classico Limewash absorb without drying too quickly. The wall should be wet, but not dripping.
-
Apply the Limewash to your wet section with the Masonry Brush so the brick is no longer visible.
-
As the product begins to dry it may look darker than expected – don’t worry, it dries a lighter color!
-
Wait 15-20 minutes for the Limewash to partially dry before distressing it.
-
The best time to distress the surface is in the first hour after applying the Limewash, so be sure to work in small sections.
-
Distress the Limewash by spraying a single brick or small area with water and wiping the product off. Take off more to show the brick underneath, or less for an all-over whitewashed brick.
-
Limewash can be further distressed or removed for 2-5 days. You can always add another coat, or remove more with a spray bottle and quick scrub.
Clean up is easy; wash all equipment with dish soap and water, and wipe up splatters with a wet rag. Once Romabio Limewash is fully dry it is more stubborn to remove, but scrubbing with a little vinegar takes it off.
Are you ready to whitewash your brick house for that beautiful old world look? You can buy Classico Limewash in 7 pre-tinted colors right here at Rings End. And don’t forget to share your Limewash projects with us – we can’t wait to see what you do!